by John Clayson
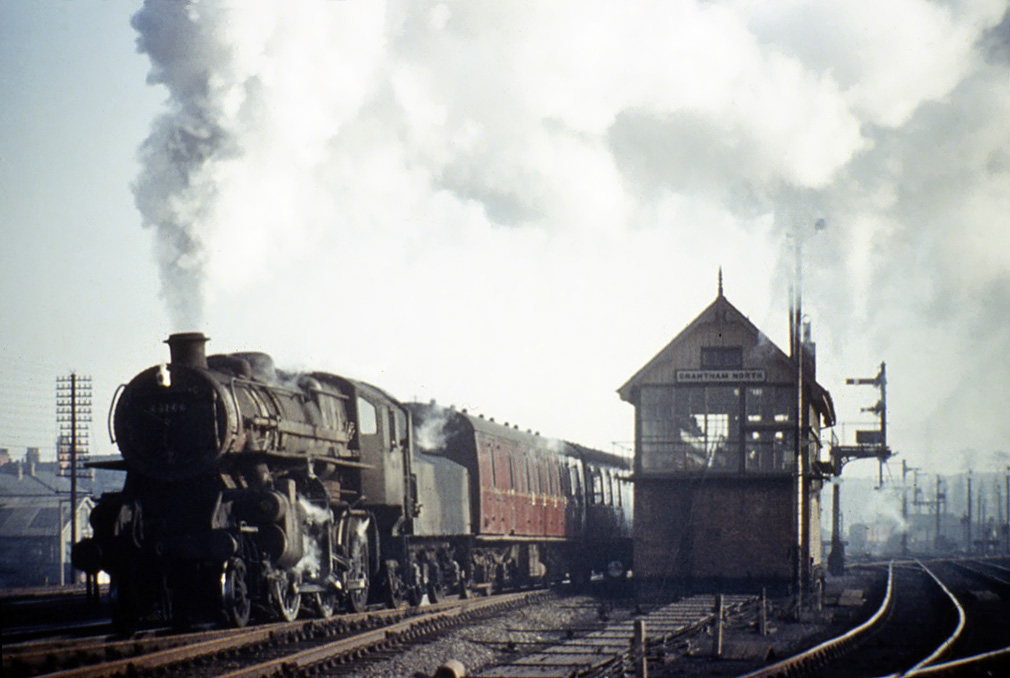
Grantham North signal box was situated at the north of the station on the west side of the main line. It was about halfway between the end of the northbound main line platform and the bridge over Harlaxton Road.
Grantham North was the largest of the Grantham boxes, equipped with 105 levers from its final extension in 1903 until it closed in 1972. It was also the most highly graded. The box was staffed round-the-clock in three shifts (two on a Sunday) by a Signalman of senior grade and a Telegraph Lad, a trainee signalman. The intensive train, locomotive and shunting movements probably made it one of the busiest mechanical signal boxes in the country to be operated by a single Signalman.
Here are some photographs which help to place Grantham North box in the context of the track layout and traffic flows at the north end of the station.
A View from Above
The North Box was surrounded by railway lines:
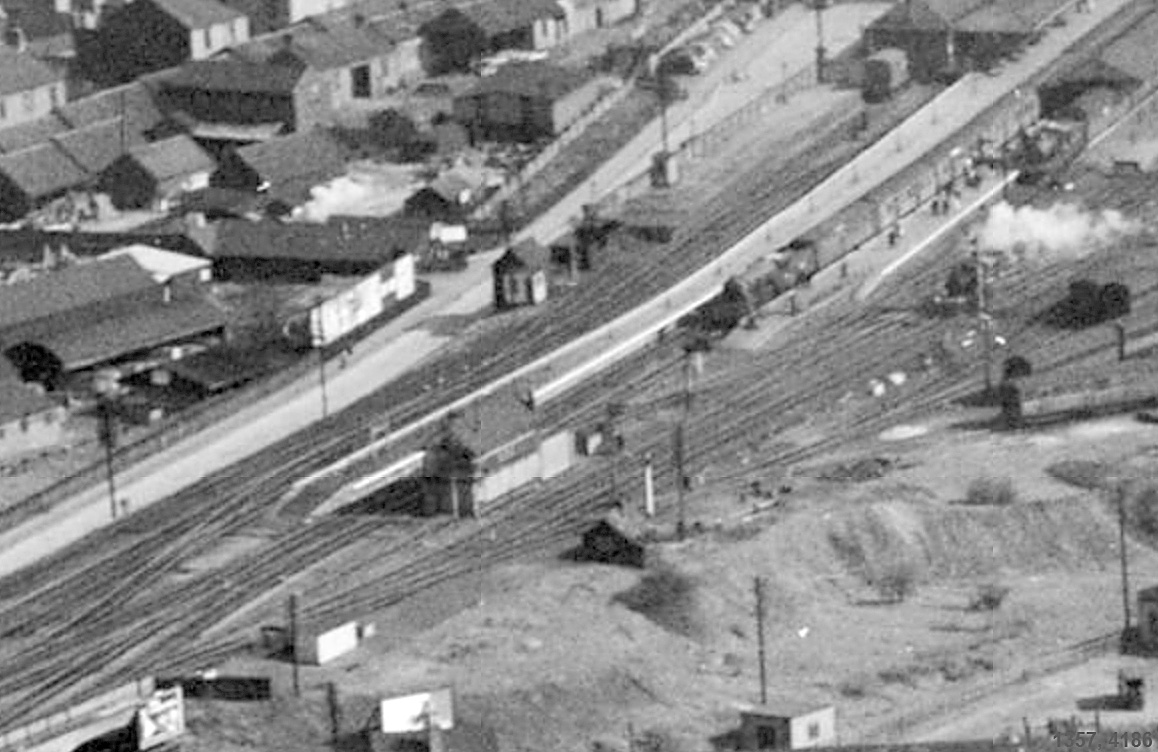
Photograph from Britain From Above © English Heritage.
The Main Lines
The Up Main and Down Main lines passed in front of the box, on its eastern side.
The Down Main Line
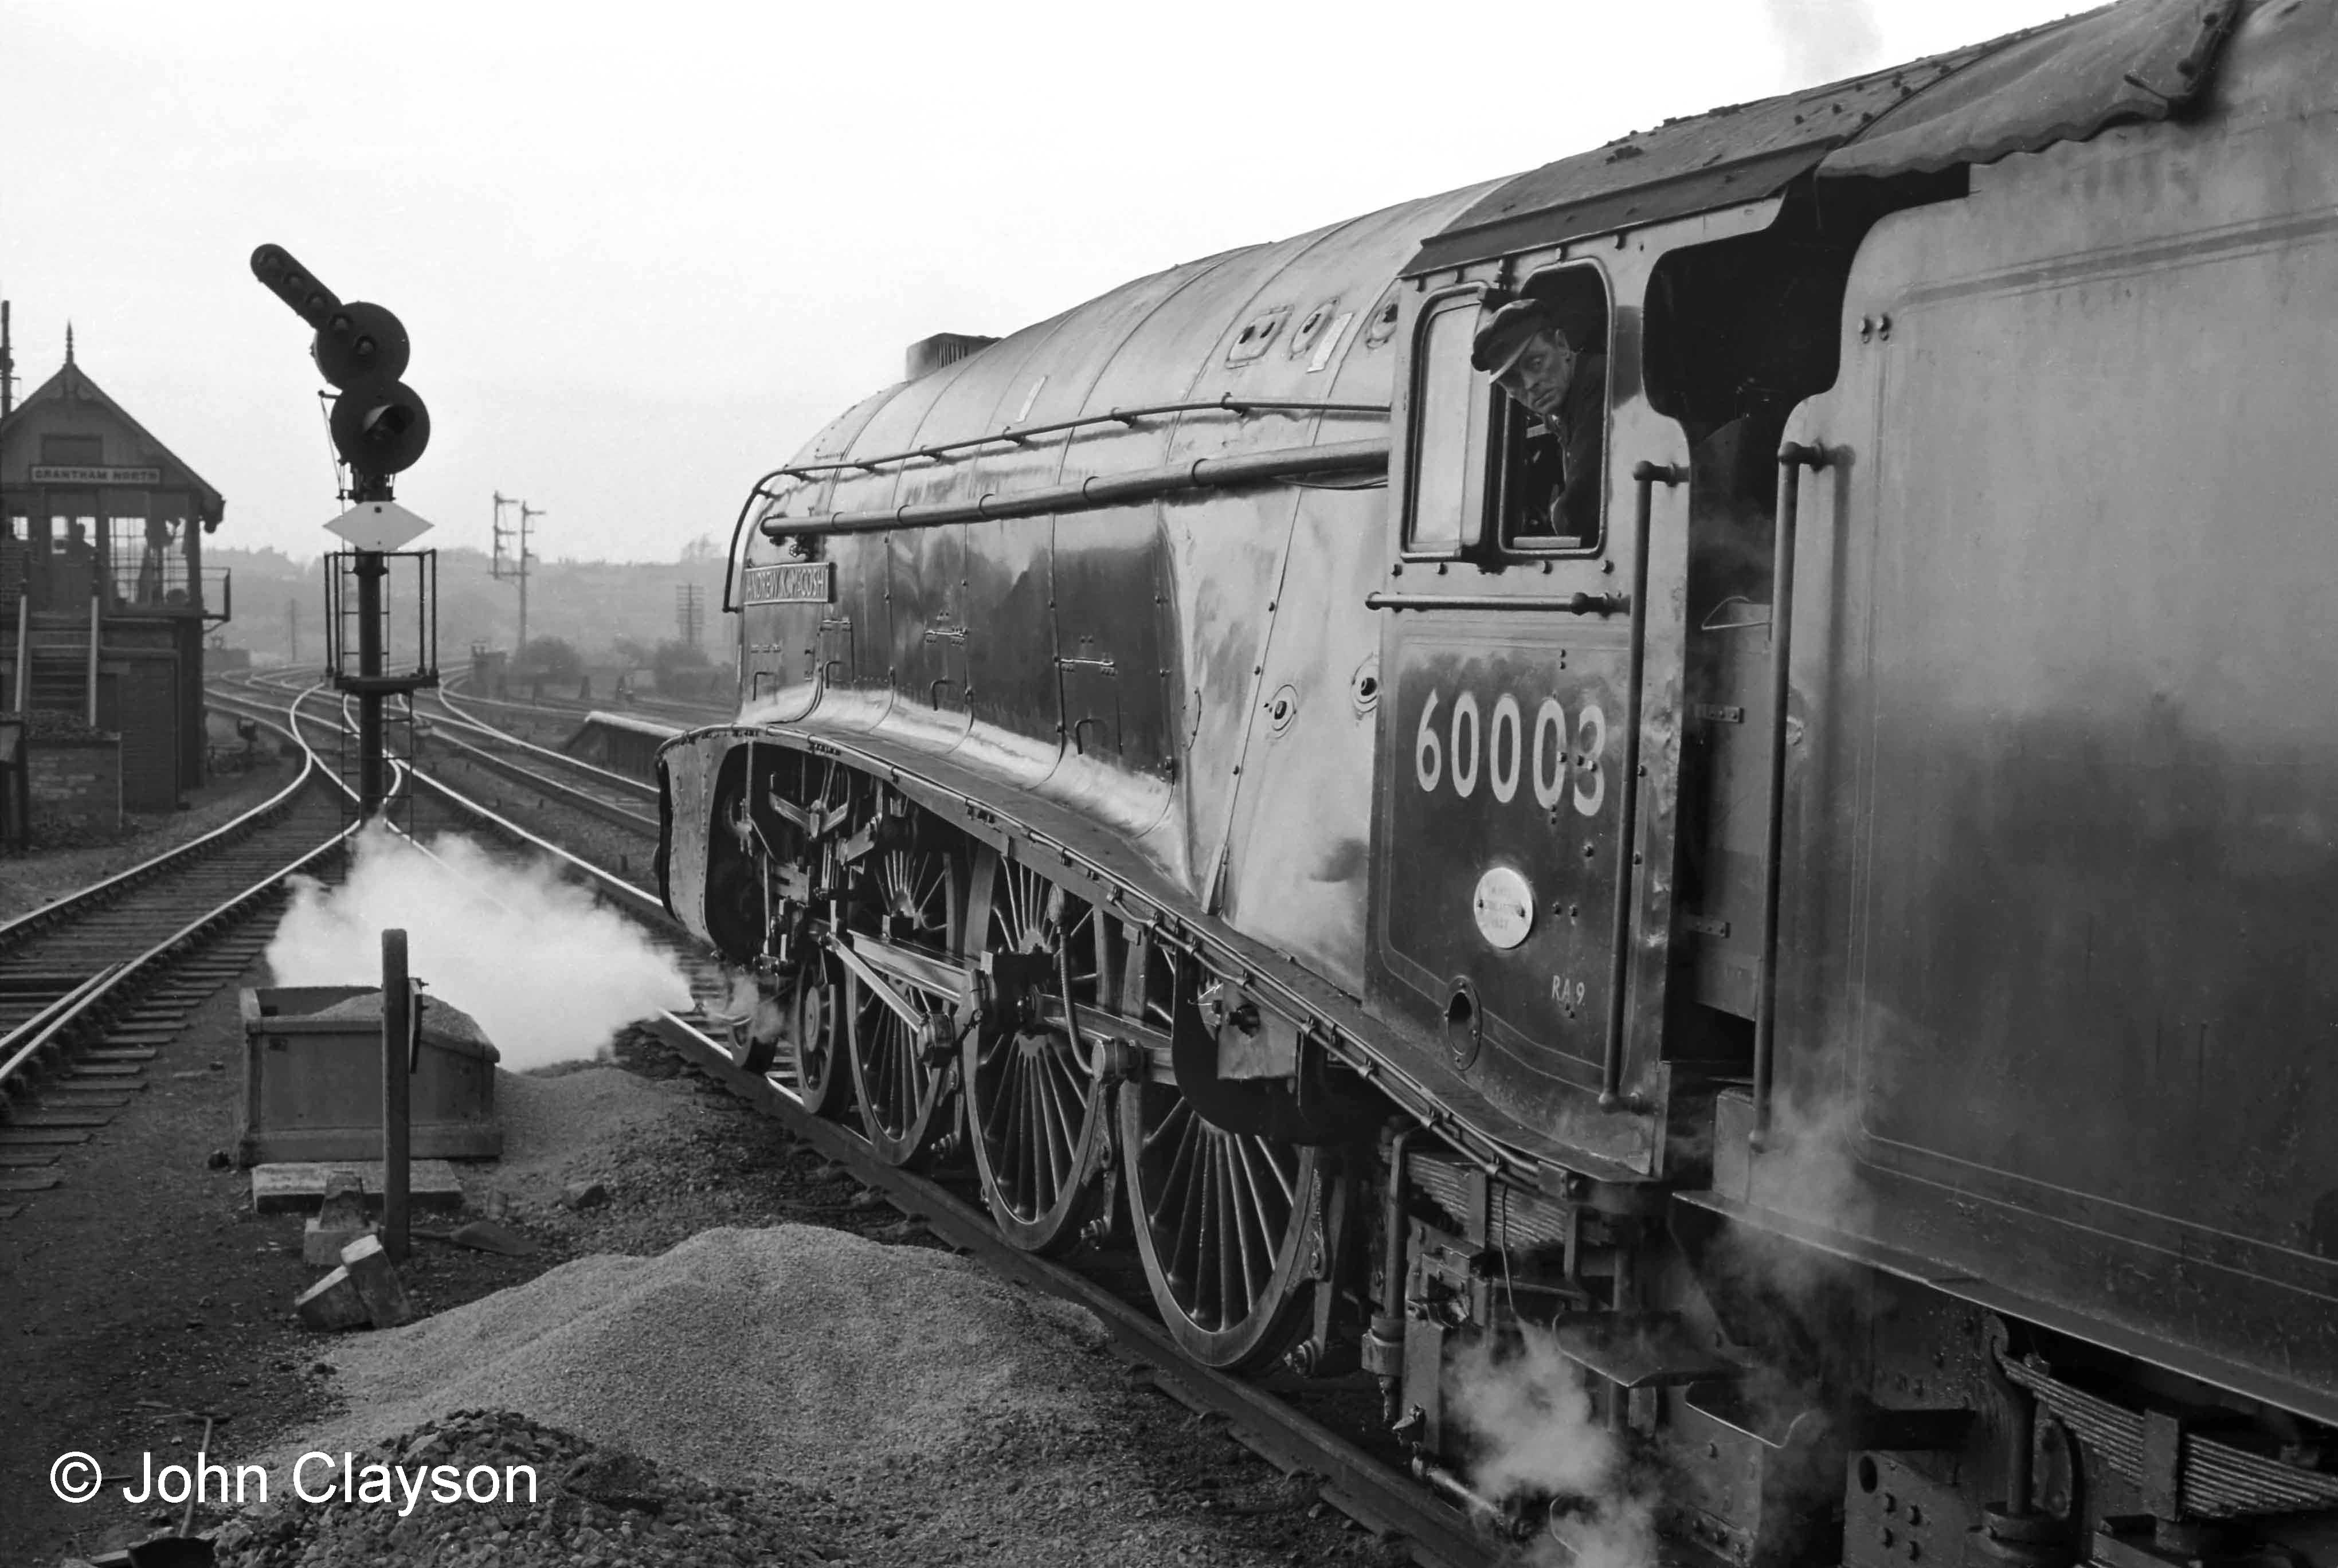
Photograph by Cedric A. Clayson.
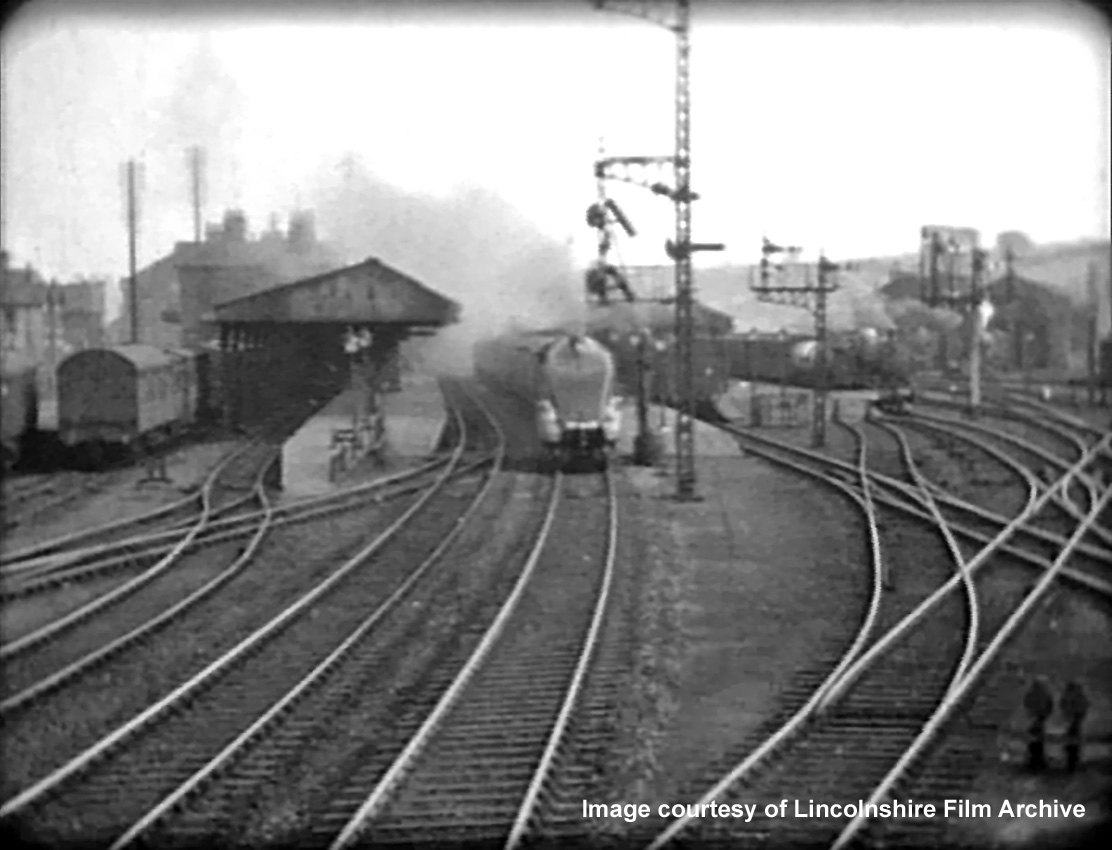
Taken from a cine film shot by photographer and film maker Walter Lee of Grantham. © Lincolnshire Film Archive
See the unique footage from which this image was taken on the Grantham Looks Back DVD, available from Primetime Video.
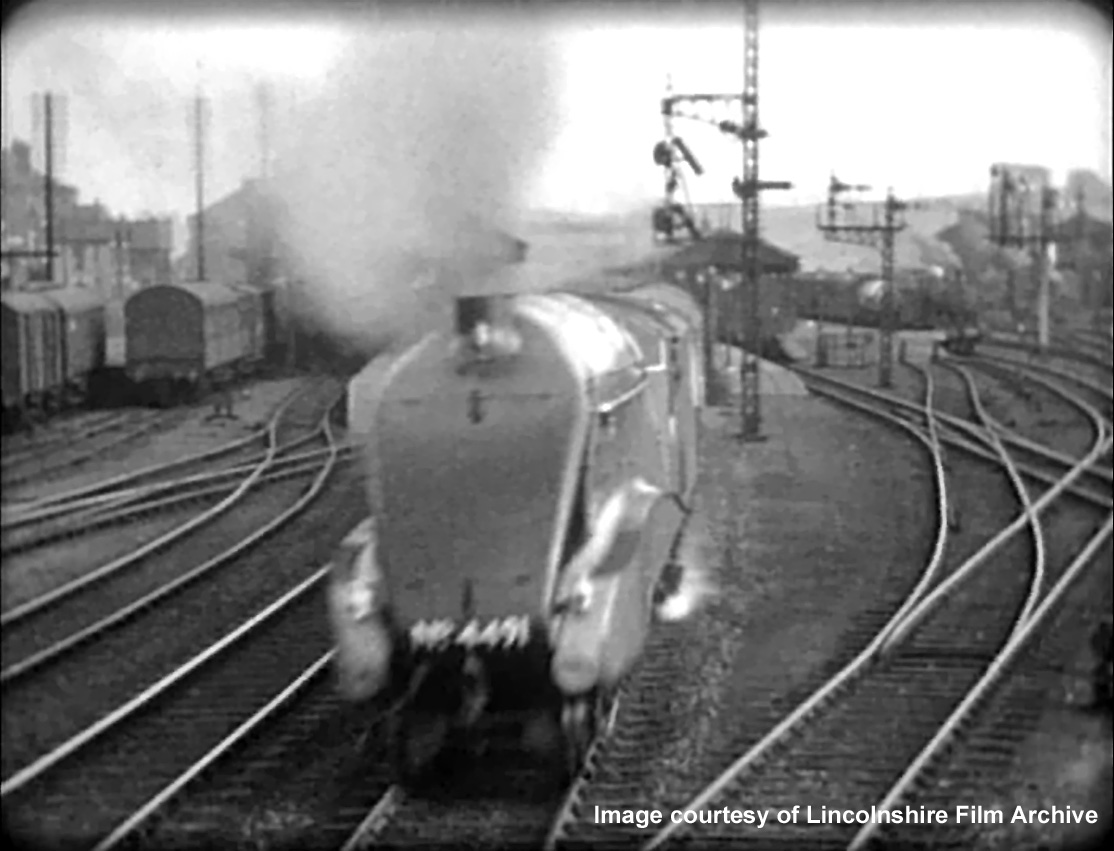
Taken from a cine film shot by photographer and film maker Walter Lee of Grantham. © Lincolnshire Film Archive
In the foreground, leading from the base of the box, is an array of steel point rodding carried on rollers. Each rod operates a different point mechanism from its nominated lever in the box.
Photograph taken by Noel Ingram.
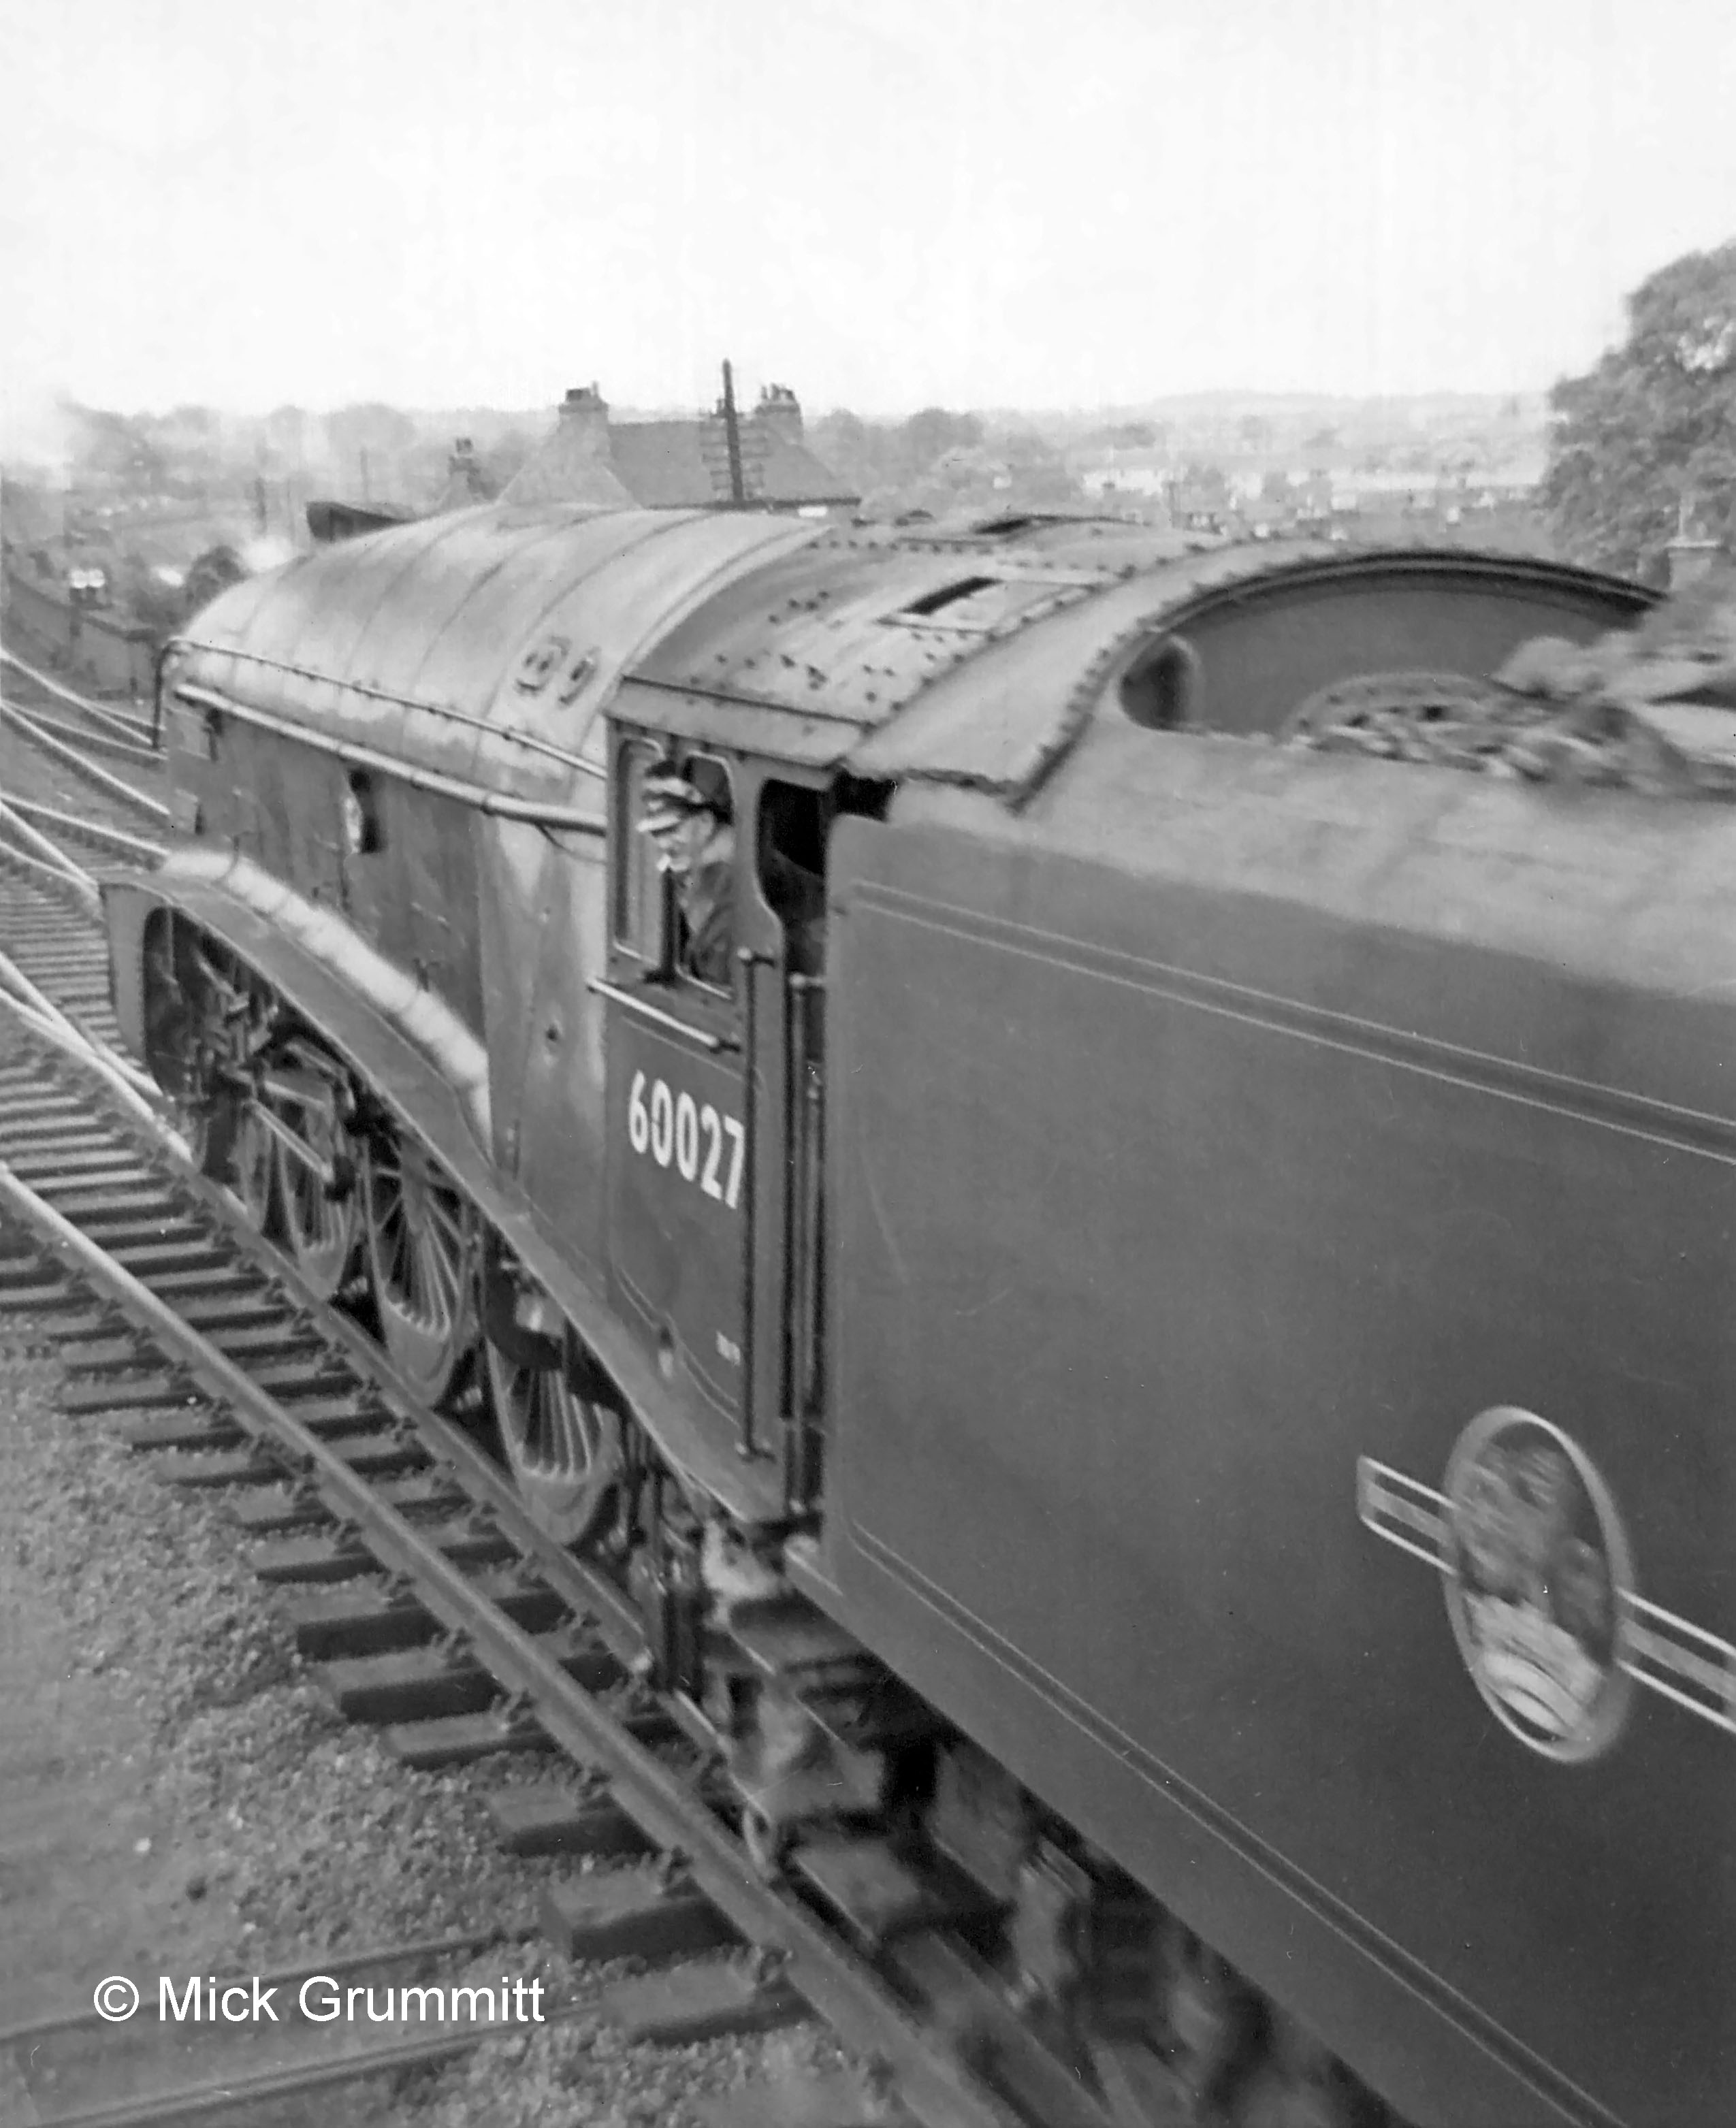
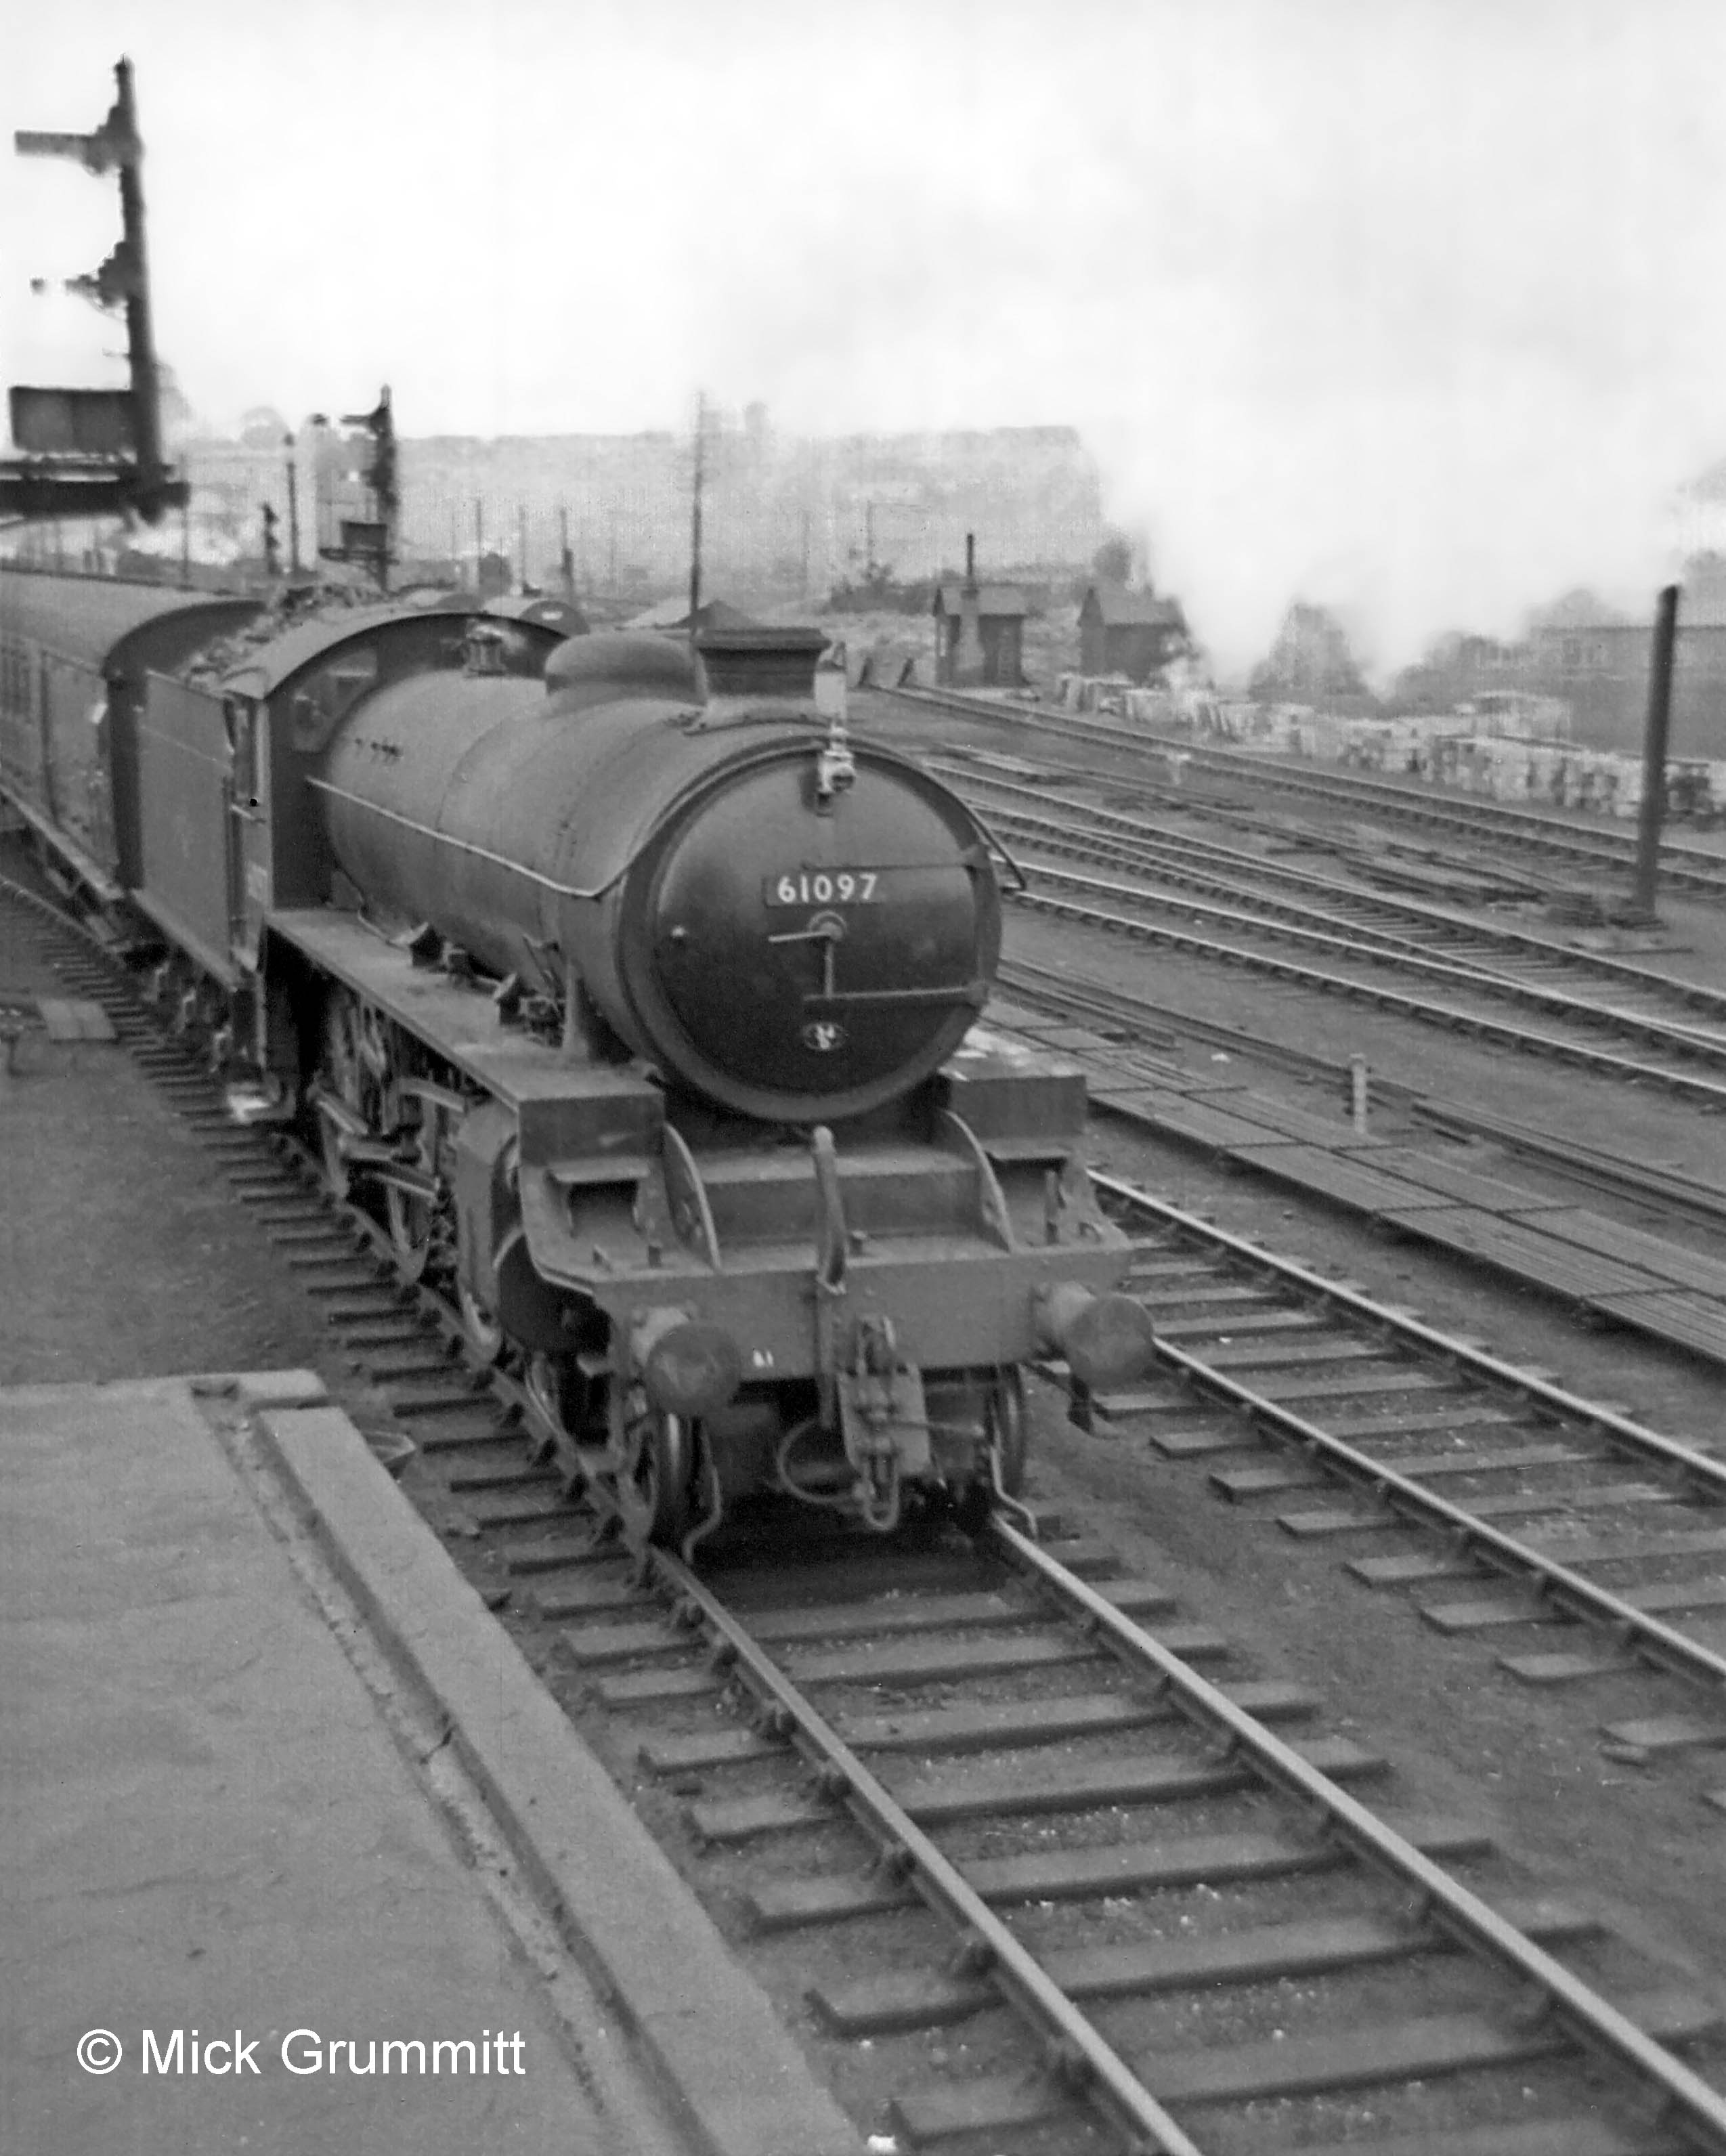
Mick Grummitt who took this photograph recalls that this was the Down Elizabethan which was scheduled non-stop between London and Edinburgh, taking water at troughs en route. On this occasion the crew had stopped for water at Grantham because they had a ‘poor dip’ at Langley troughs near Stevenage (probably because the troughs hadn’t had time to refill fully after the previous train) and the following troughs at Werrington, north of Peterborough, were out of use for maintenance work. They didn't want to risk the next troughs, at Muskham near Newark, being low as well.
Mick remembers that the unexpected 'arrival' of a passenger train at the platform when none was due caused a bit of a panic among the station staff!
Photograph by Mick Grummitt, relief Telegraph Lad at Grantham North 1959-62.
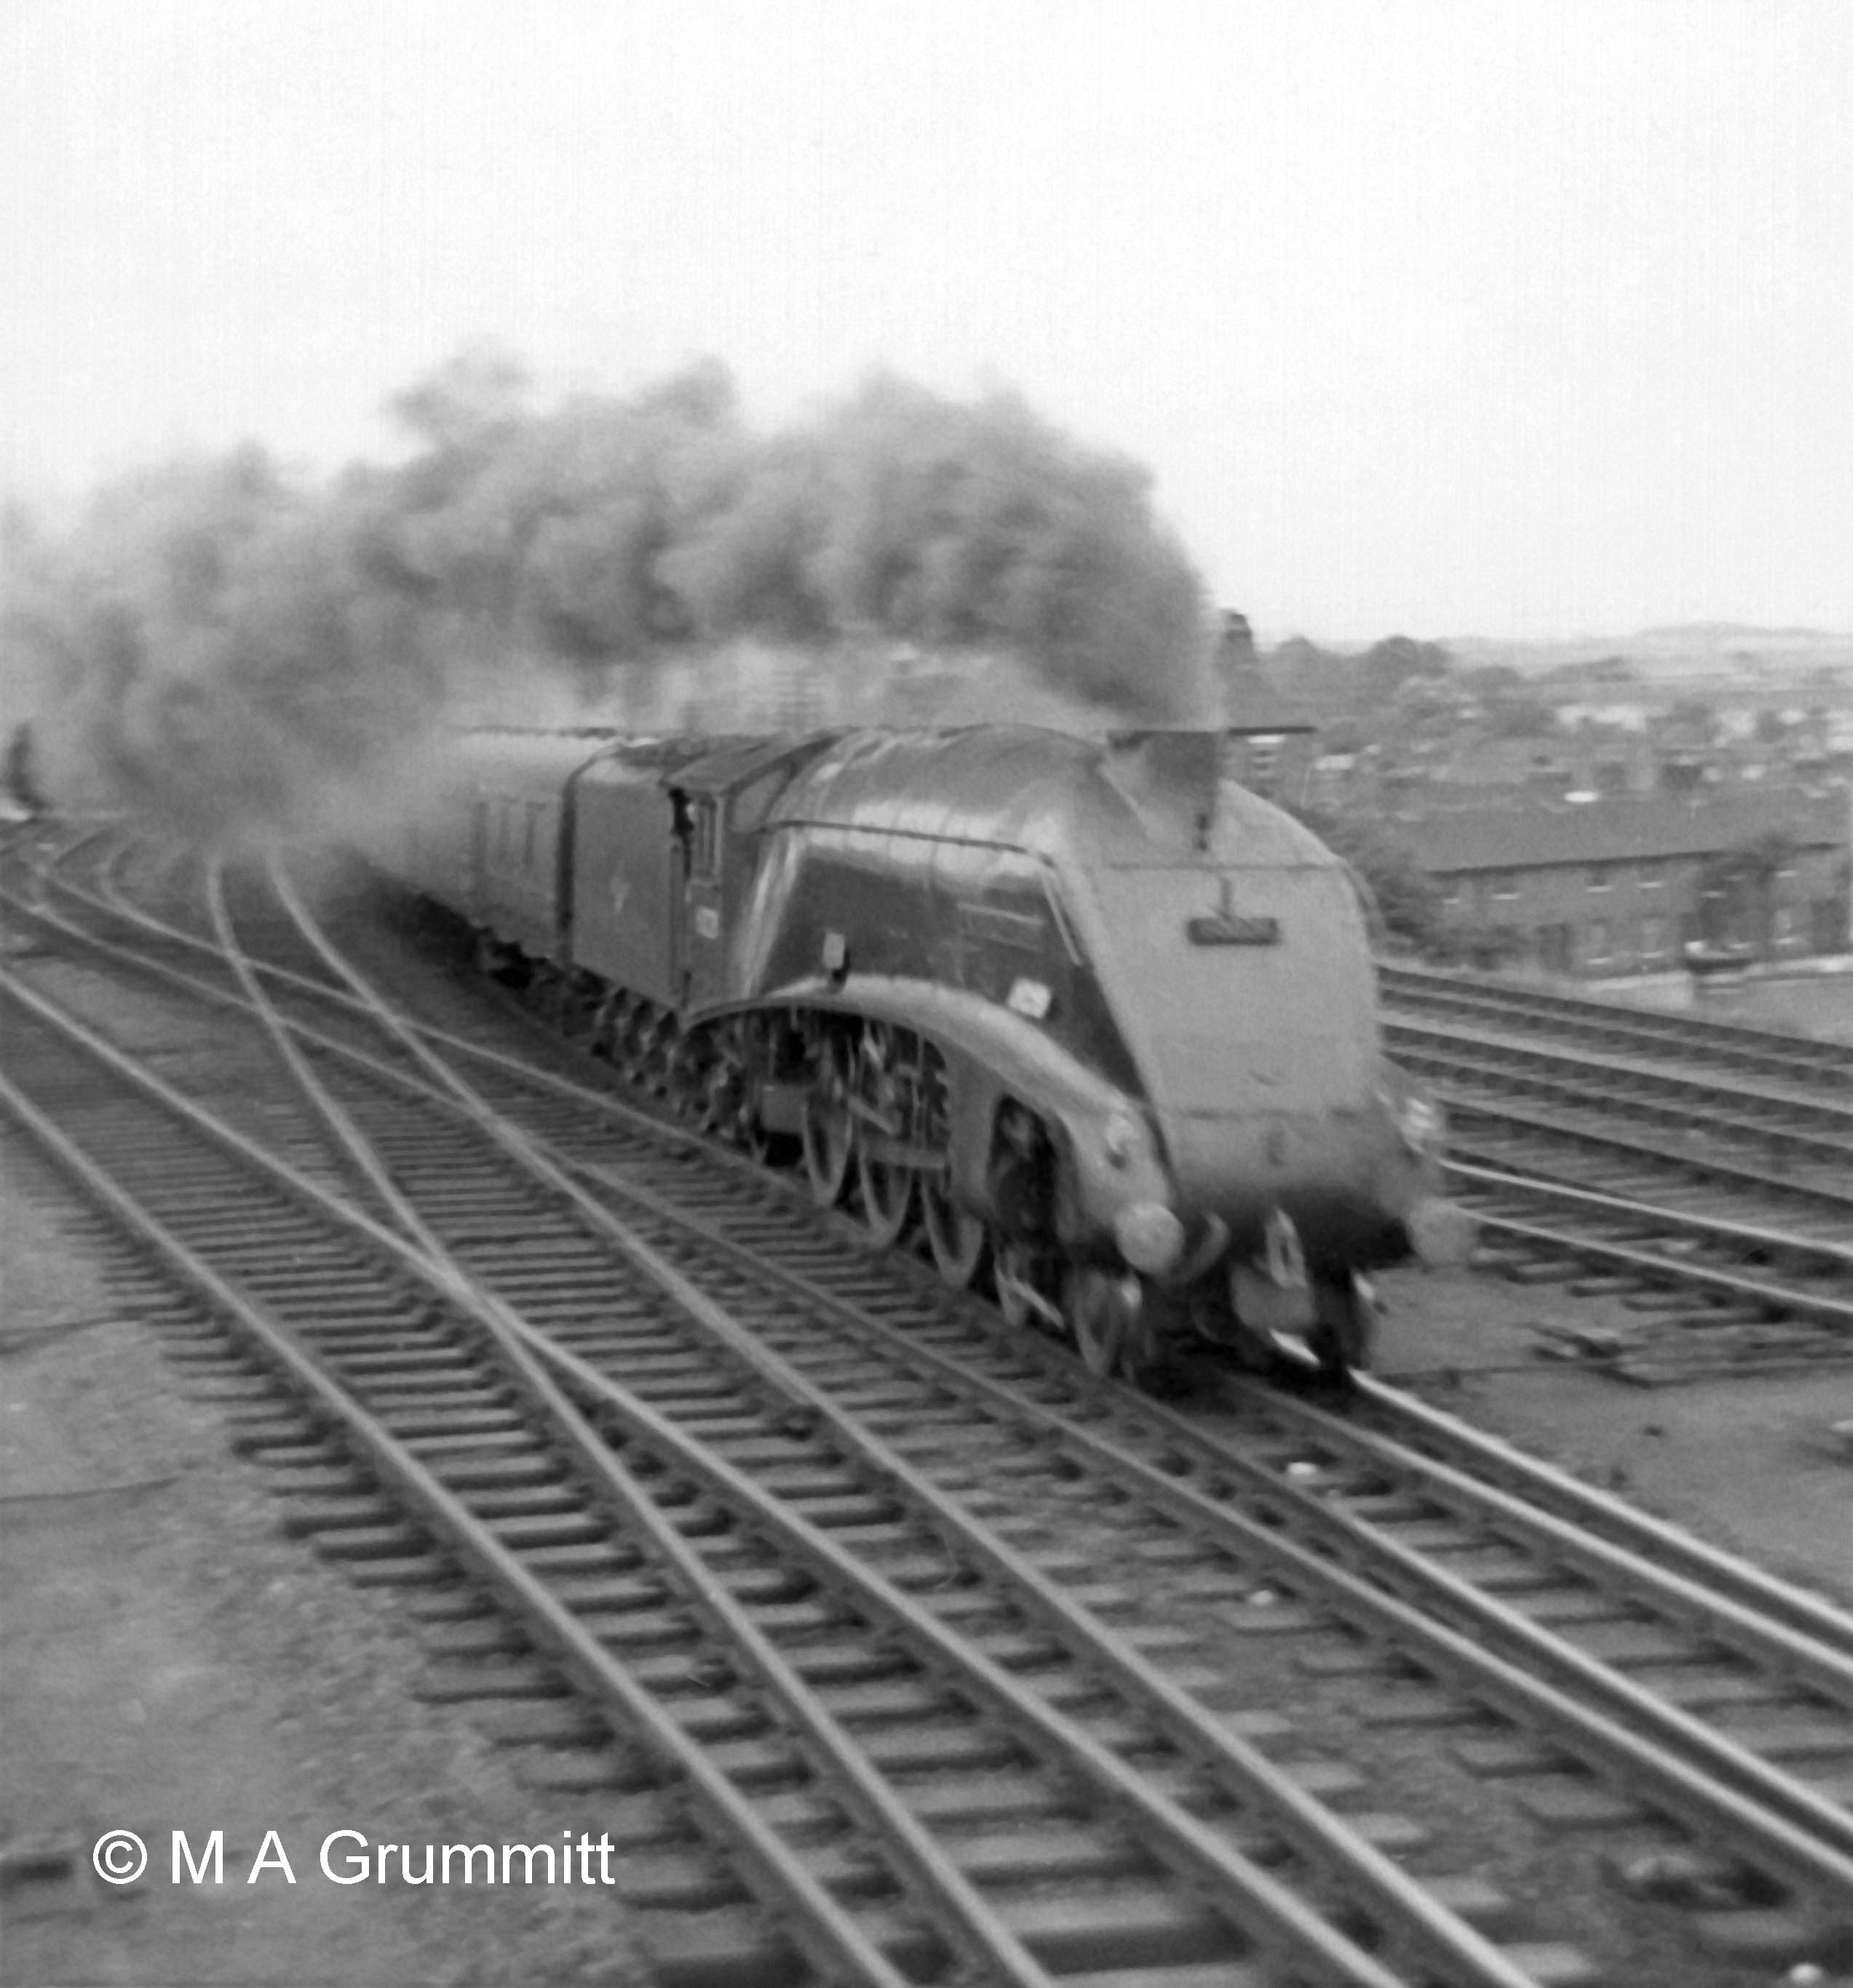
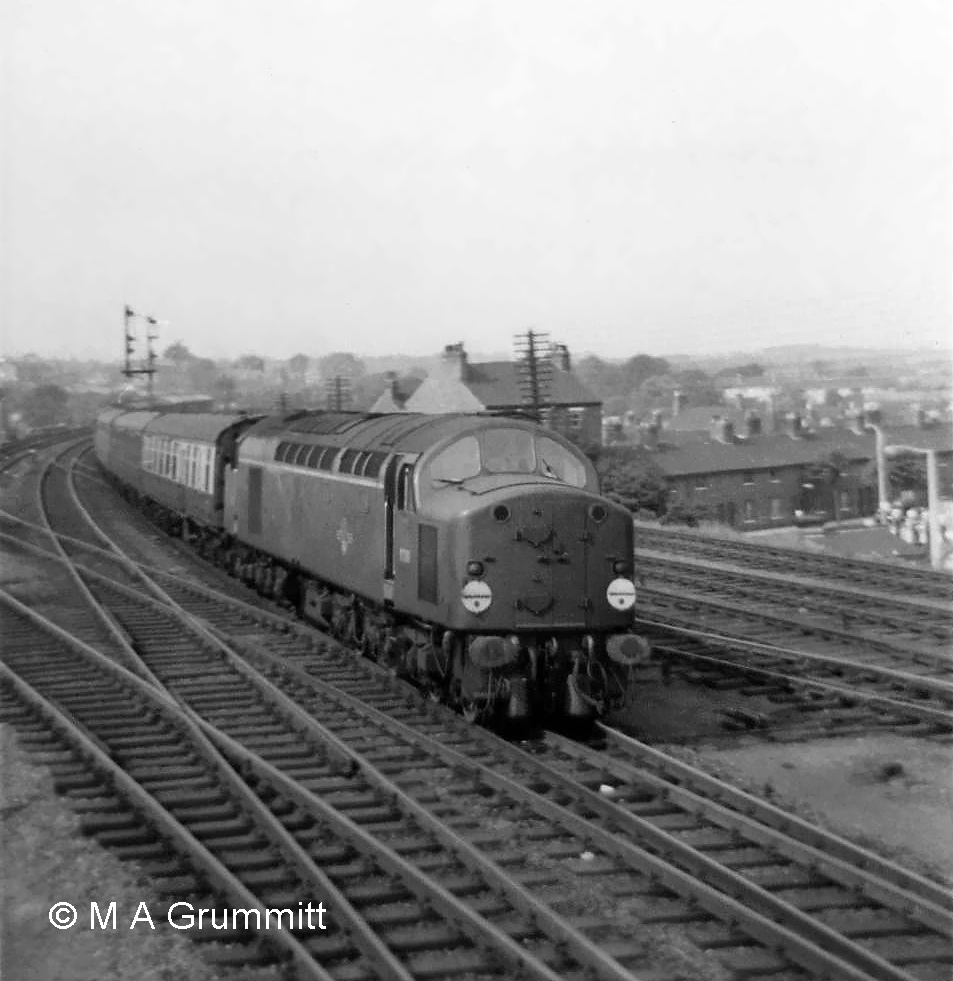
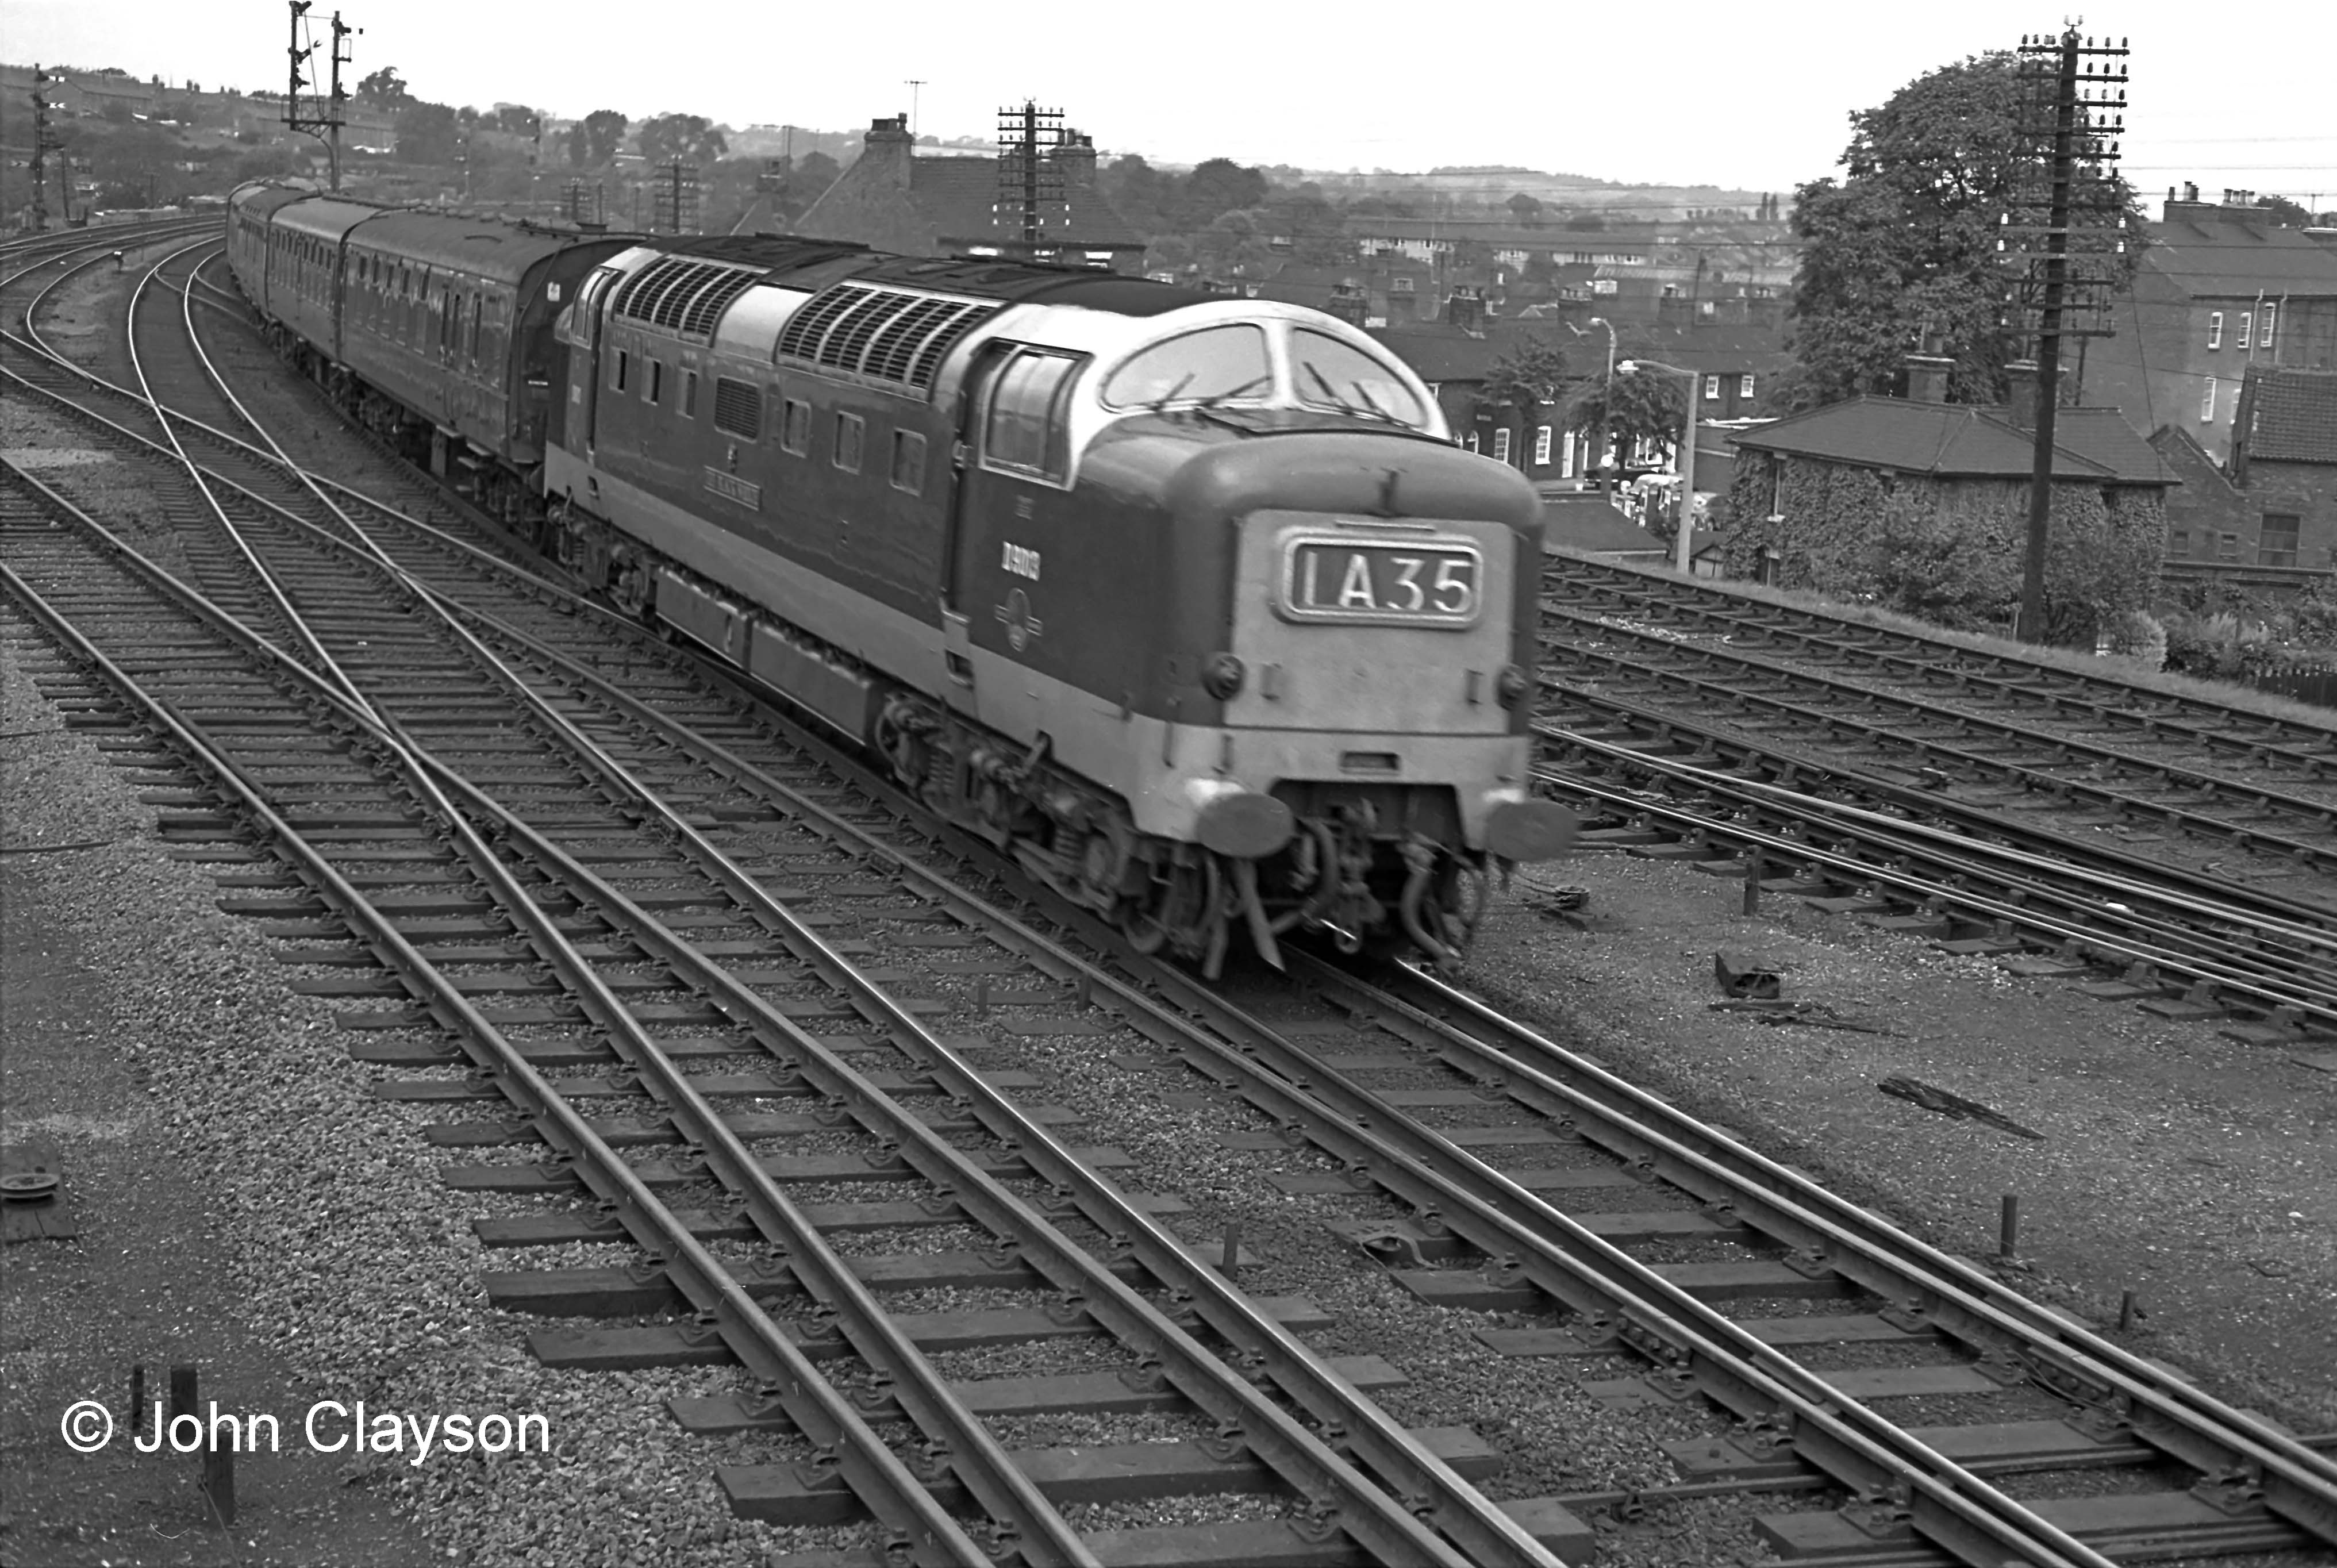
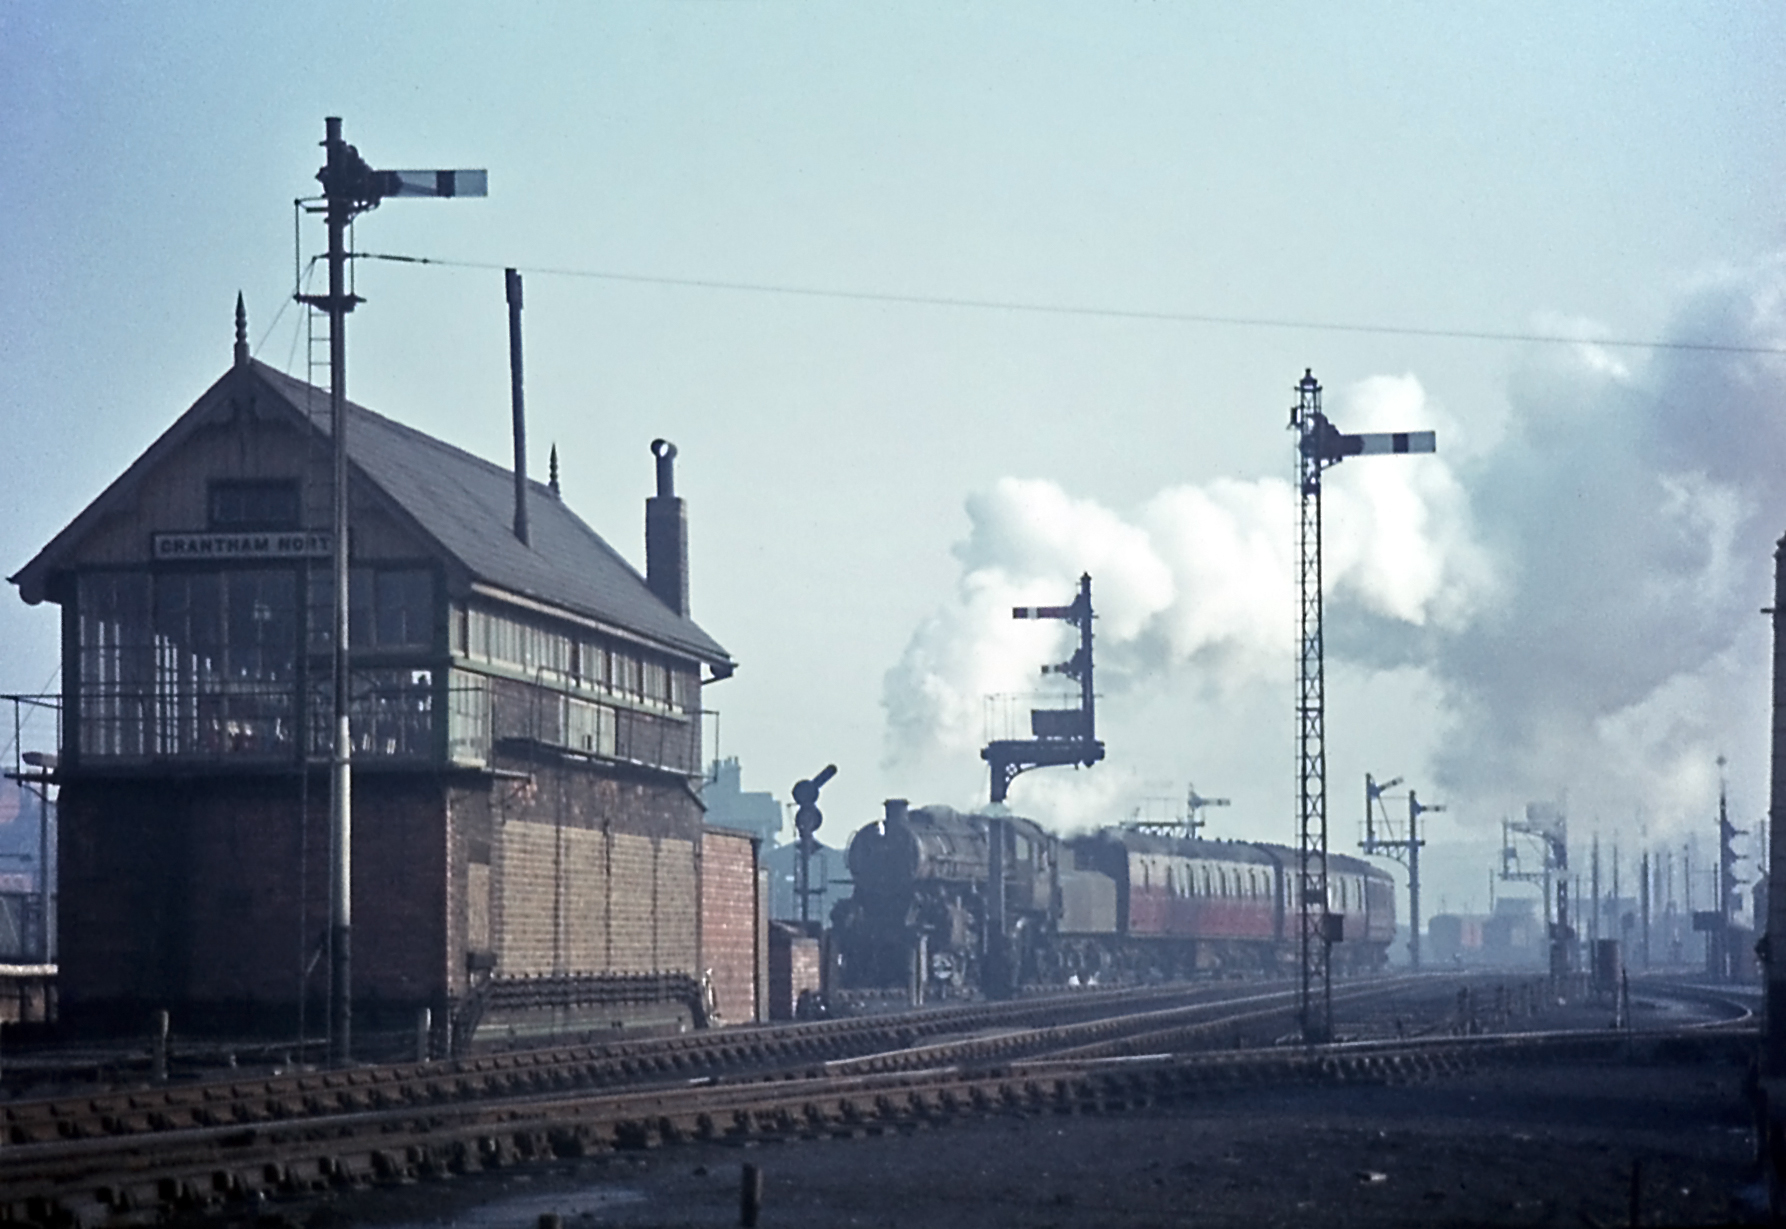
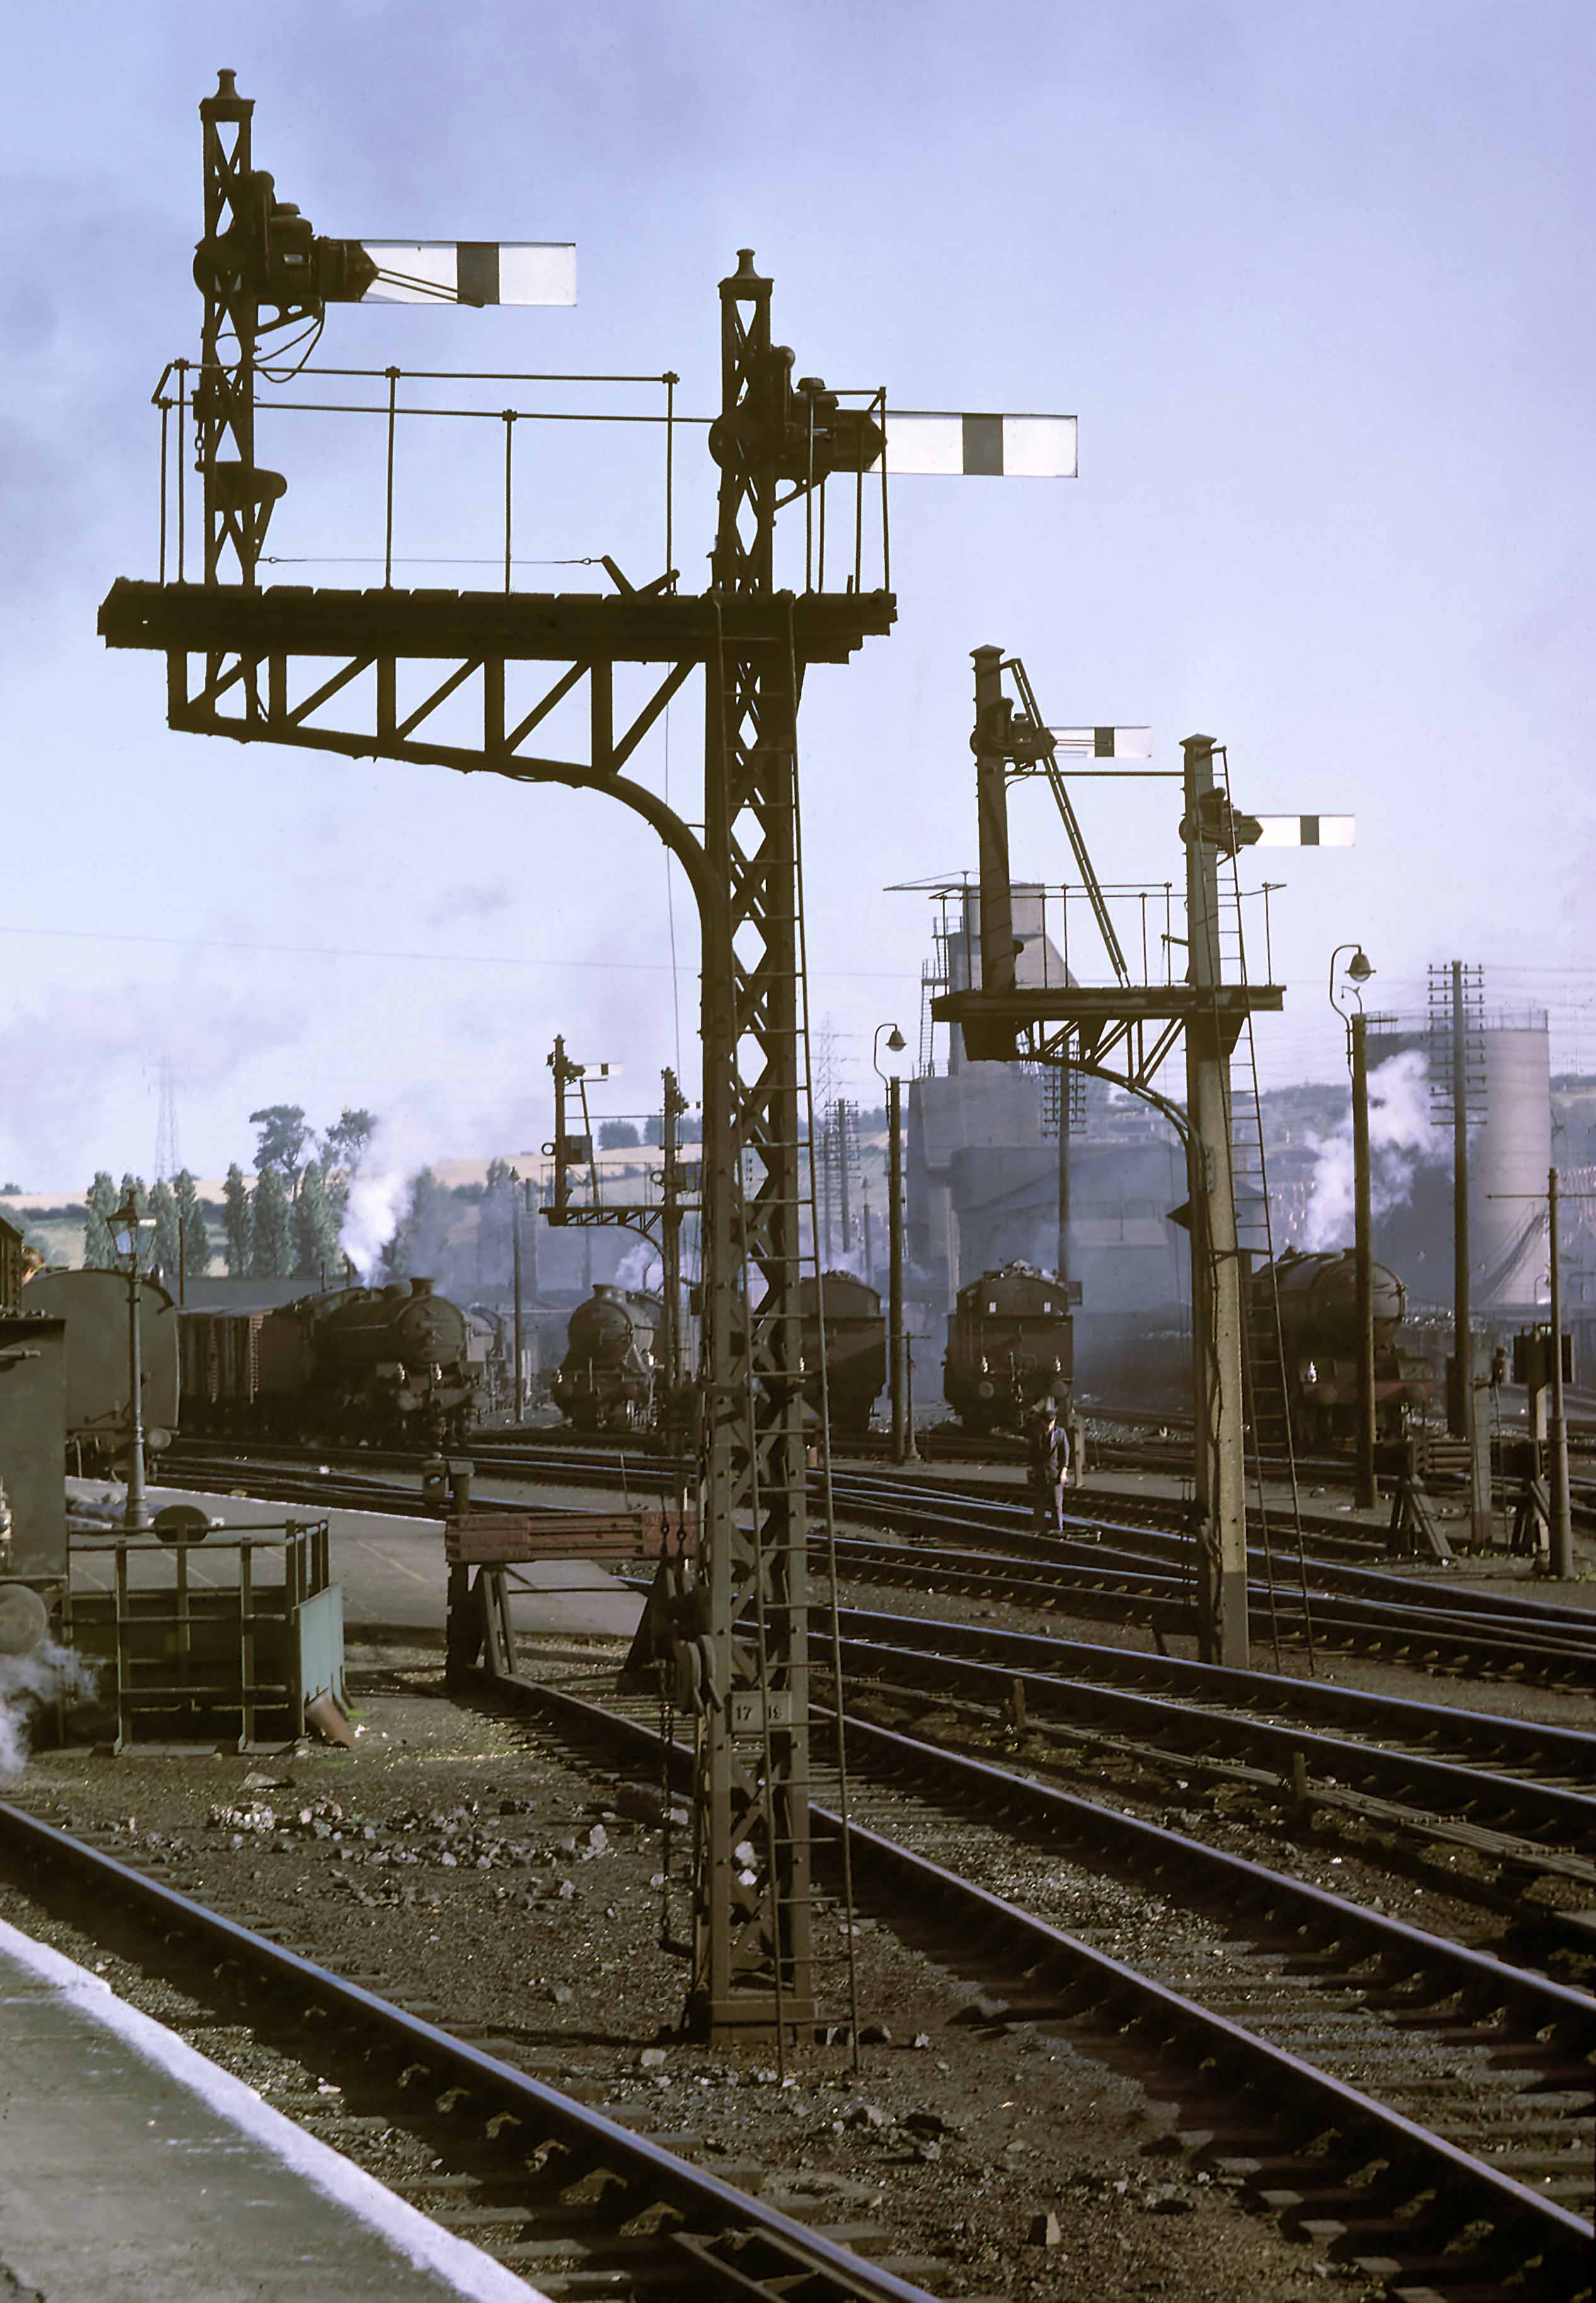
The Up Main Line
Here are three photographs of southbound expresses taken from the roof of the relay room. They capture the variety of locomotive power seen during the late 1950s and early 1960s. The trains are all crossing the junction with the Nottingham lines.
Photograph by Mick Grummitt
Photograph by Mick Grummitt.
Photograph by Cedric A. Clayson.
The Junction for Nottingham and the Up Bay Platform Connection
The junction with the Nottingham Lines was immediately to the north of the box; just beyond was the connection from the Up Main line into the Up Bay platform (platform 1) on the eastern side of the station.
On the extreme left is a connection from the Down Nottingham line to the Up Nottingham line, which enabled locos off the shed to access the Up Main line through the station to Grantham Yard box, for locomotive changes on southbound trains.
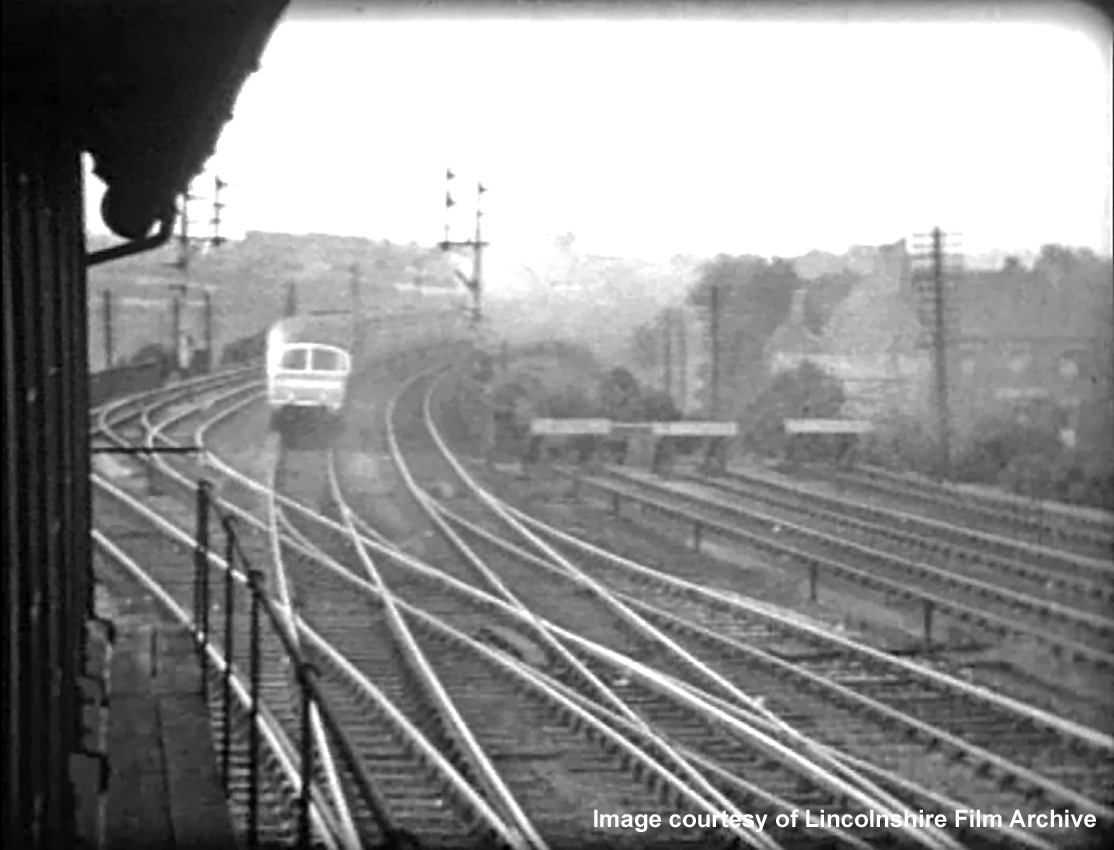
The Coronation service recedes at speed on the Main line towards Barrowby Road, its unique Observation Car bringing up the rear.
Taken from a cine film shot by photographer and film maker Walter Lee of Grantham. © Lincolnshire Film Archive
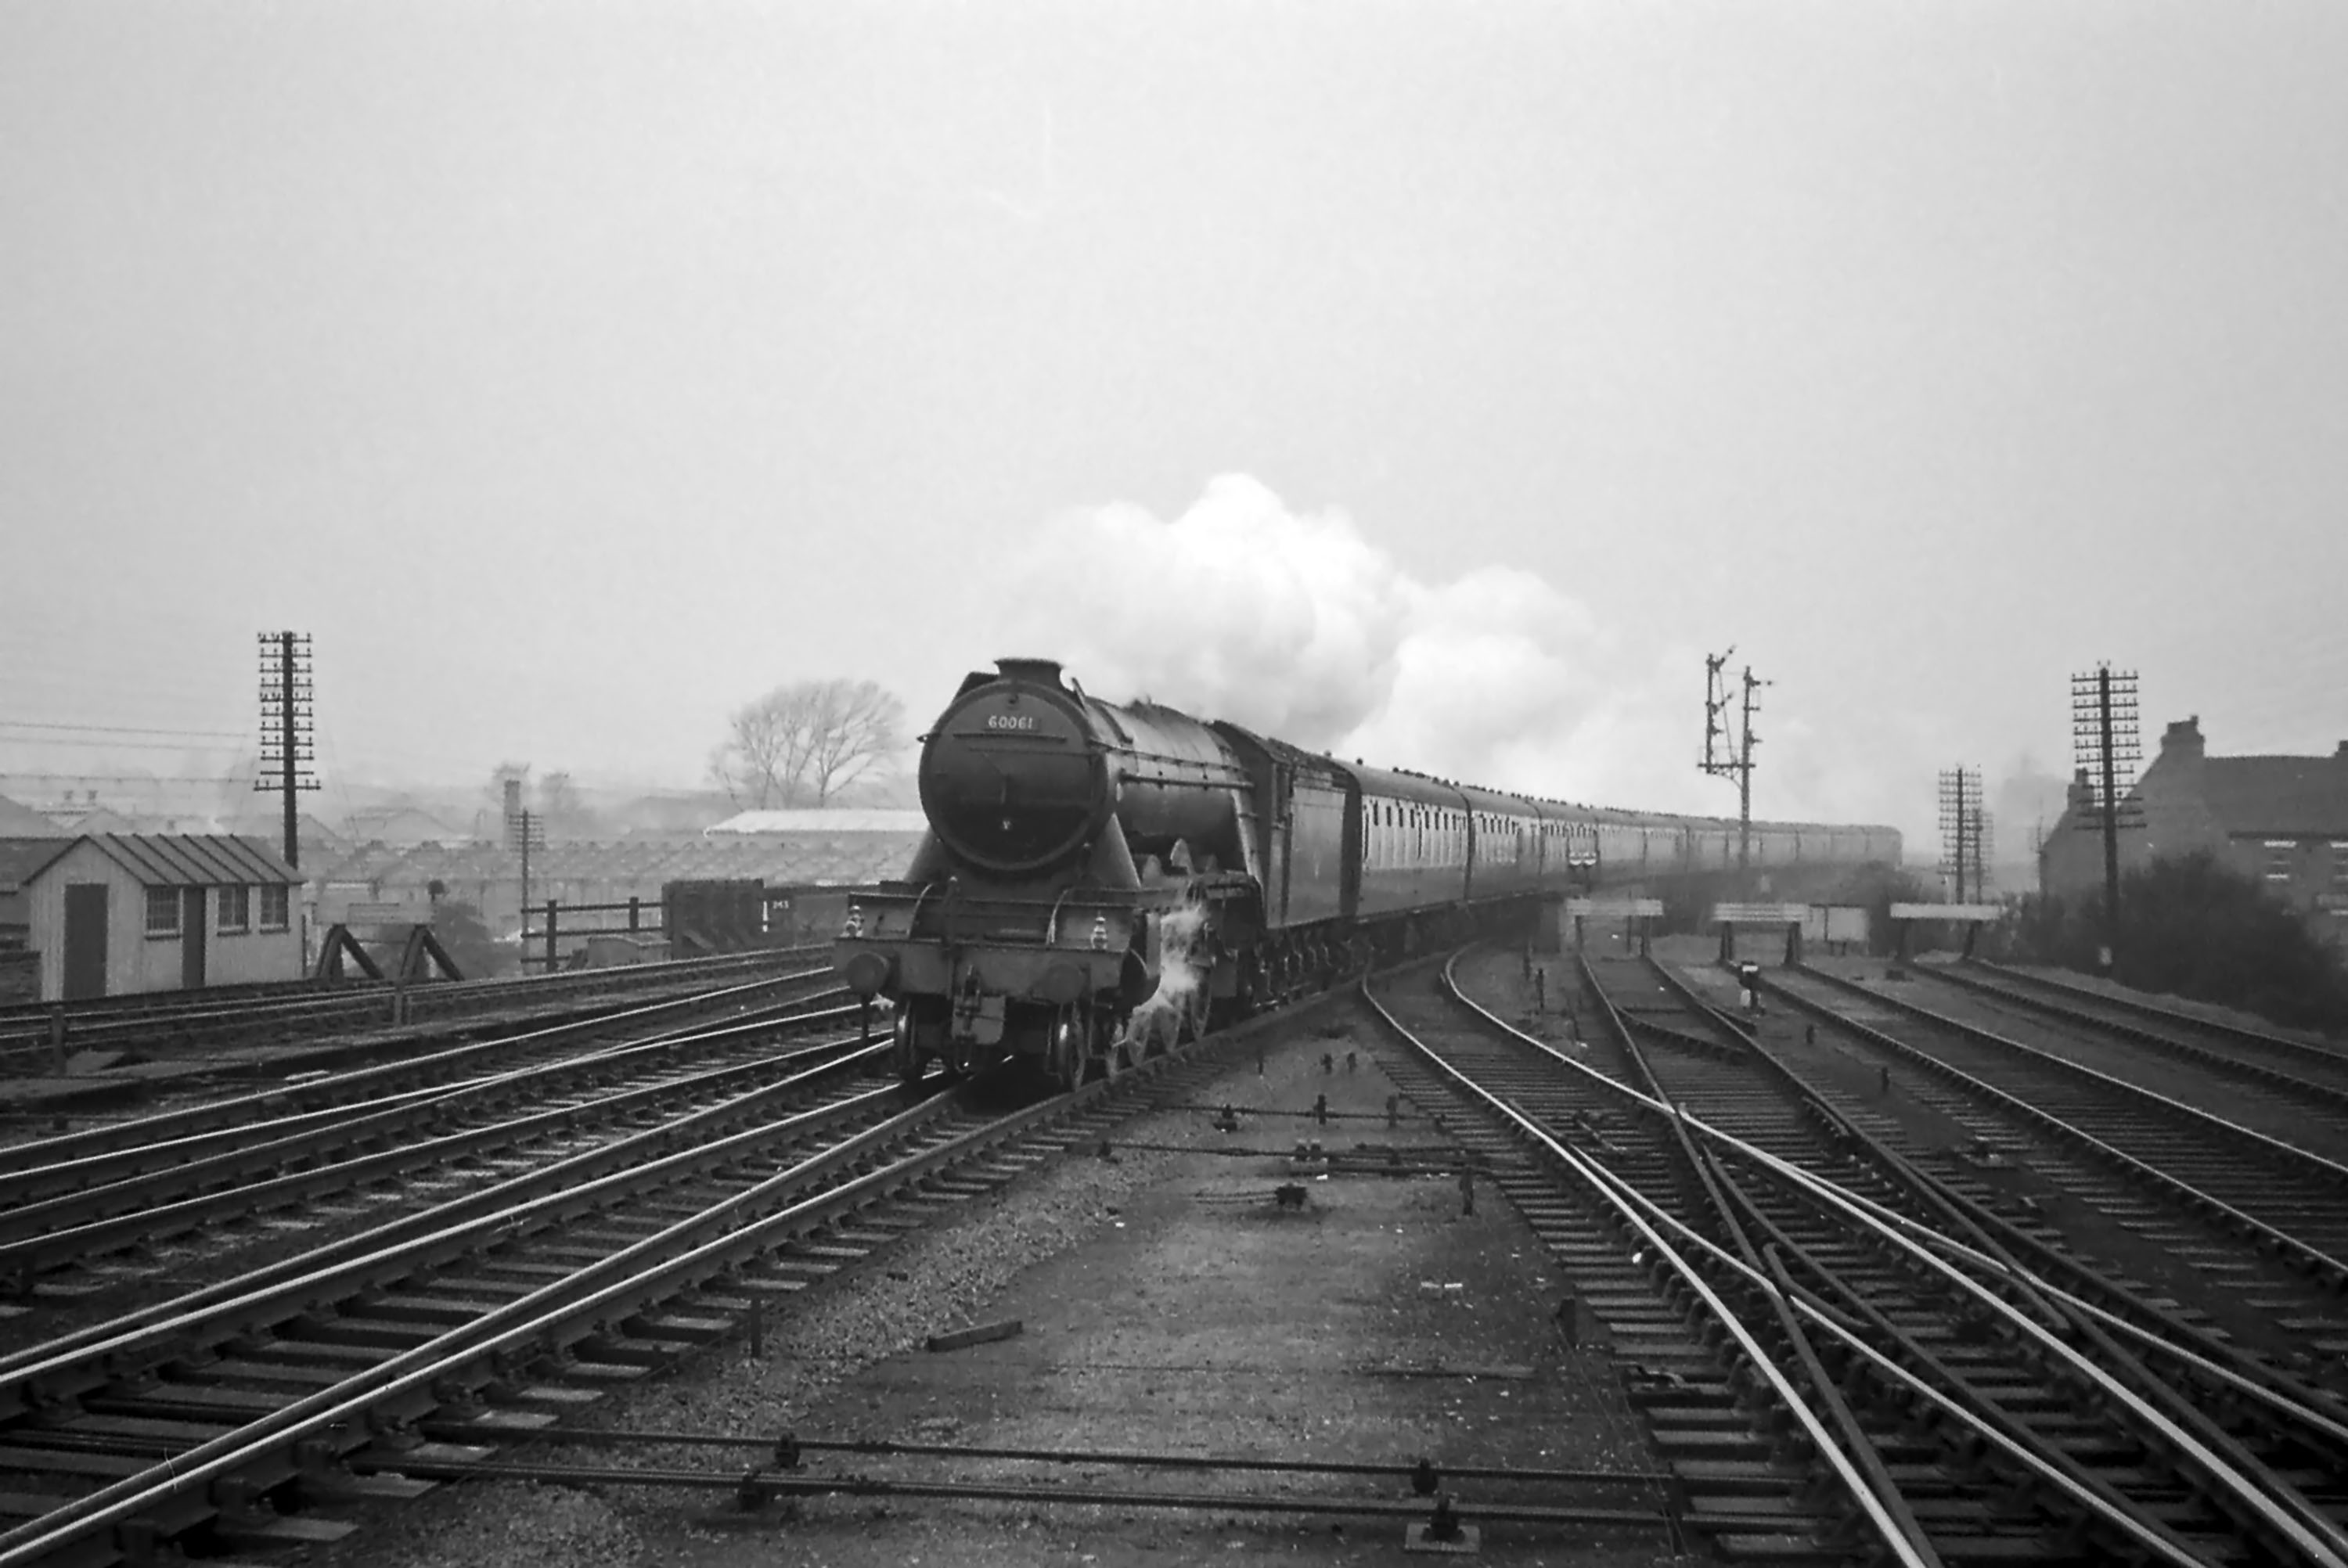
The first coach of this southbound train on the Up Main line, hauled by No. 60061 Pretty Polly, is passing over the connection to the Up Bay platform.
The Nottingham lines are converging into the Main lines from the left.
We can see that the train is not stopping at the station because both the Grantham North box Up Main home signal and, beneath it, the Grantham Yard box Up Main distant signal are showing ‘clear’. To the right of the Main Line signals is the signal for the Up Bay platform.
It’s worth pointing out here the two lines of telegraph poles, one on each side of the railway, which used to be so much part of the everyday railway scene. These pole routes carried the block telegraph, the ‘speaking' (single needle) telegraph, telephone and other circuits on which the railway depended for the communication vital to effective operation. It was the responsibility of the Signal and Telegraph (S&T) Engineers and Technicians to maintain this widespread network and also to keep the signals maintained and in working order. It was a job that often involved working at height exposed to the worst of the weather.
Photograph taken by Noel Ingram.
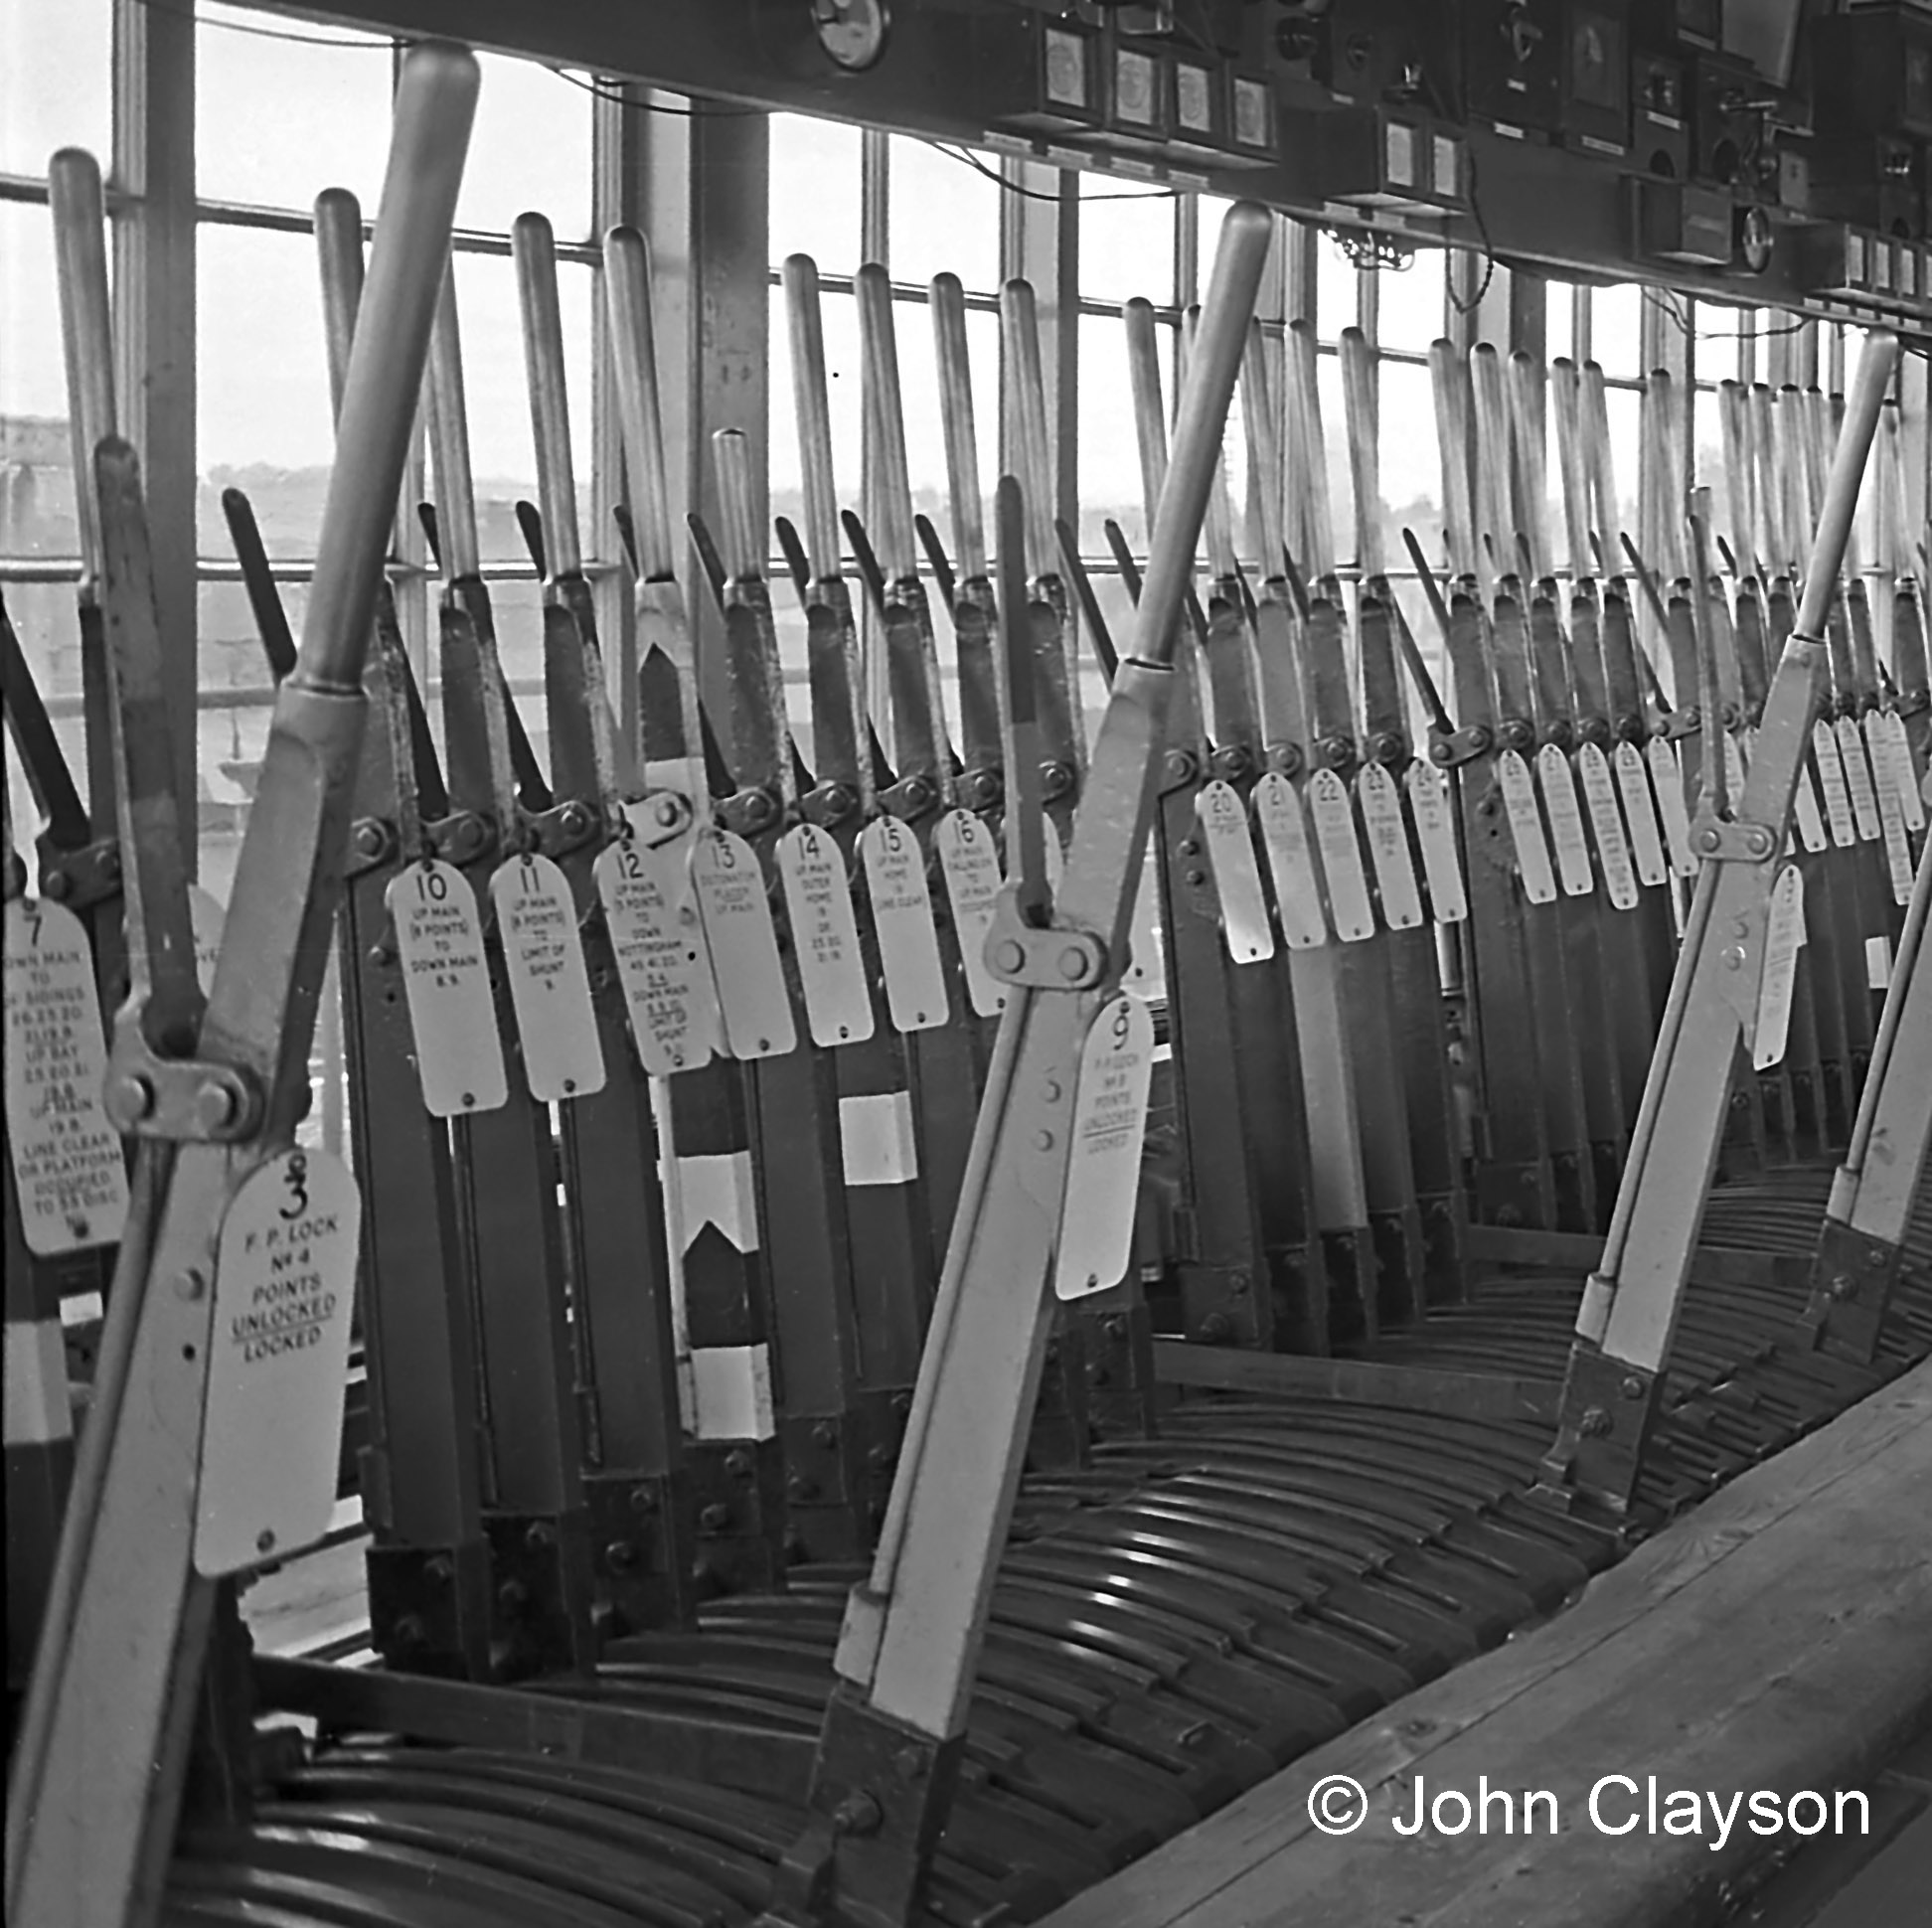
Levers in a signal box are all numbered, and also painted in colours according to their purpose. For those of us who are viewing in black and white (as snooker commentator Ted Lowe might say), the red levers (e.g. 10, 11, 12, 14, 15 & 16) control stop, calling-on or shunt signals, the black levers (e.g. 20 & 21) are for points, and the blue levers (e.g. 3, 9, 19 & 22) are for facing point locks (which are a safety device to lock points in place once they are set). The lever with black and white stripes and a chevron, 13, is for a detonator placer on the Up Main line – an emergency device that places a small explosive charge (detonator) on the rail. The detonator explodes when run over by a train’s wheels, warning the driver of danger.
The information on the lever plates tells us that levers in this part of the frame control some of the signals and points relating to the Up Main line seen in the photograph next above. For example:
15 UP MAIN HOME is the topmost of the signals which the train is passing; the white band on the lever shows that it is interlocked electrically with the block telegraph (as well as mechanically in the lever frame).
16 UP MAIN CALLING-ON TO UP MAIN OCCUPIED is the small signal on the same post, beneath the distant signal.
Moving closer to the camera, the two disc signals visible against the third coach are (left to right):
10 UP MAIN TO DOWN MAIN (relates to a trailing crossover hidden under the train).
11 UP MAIN TO LIMIT OF SHUNT.
Closer still:
19, 20, 21 & 22 control the points for the connection to the Up bay platform, in the right foreground.
Photograph by Cedric A. Clayson.

Above the far end of the signal box roof a lampman (or possibly a signals and telegraph engineer) is attending to the Nottingham line's starting signal.
There's also good detail of the Up bay starting signal.
In front of the box is a relay room, added in 1937 when Grantham North took over control of the main lines as far as Barkston South Junction.
Photograph taken by Humphrey Platts.
The Western Side
Behind the box, on its western side, were connections between the Nottingham Lines and the Down Bay platform (platform.4), the Western platform (platform 5) and the Up & Down Goods line.
Photograph by Mick Grummitt.
The four signals nearest the photographer in this view are, from left to right:
o the signal for trains departing on the Nottingham line (nearest the signal box)
o the platform starting signal for the Down Main line (a colour light signal)
o the signal for trains arriving from the Nottingham line (nearest the signal box)
0 the signal for trains departing for the north on the Goods line (to the right of the Nottingham line)
As evidenced by the stove pipe and the chimney, due to its length Grantham North box had the 'luxury' of two coal-fired stoves.
Photograph taken by Noel Ingram.
South of the Box
To the south, between the box and the platform ends, passed the connection to the Down Main line from the Down Bay platform (platform 4), the Western platform (platform 5) and the Up & Down Goods line.
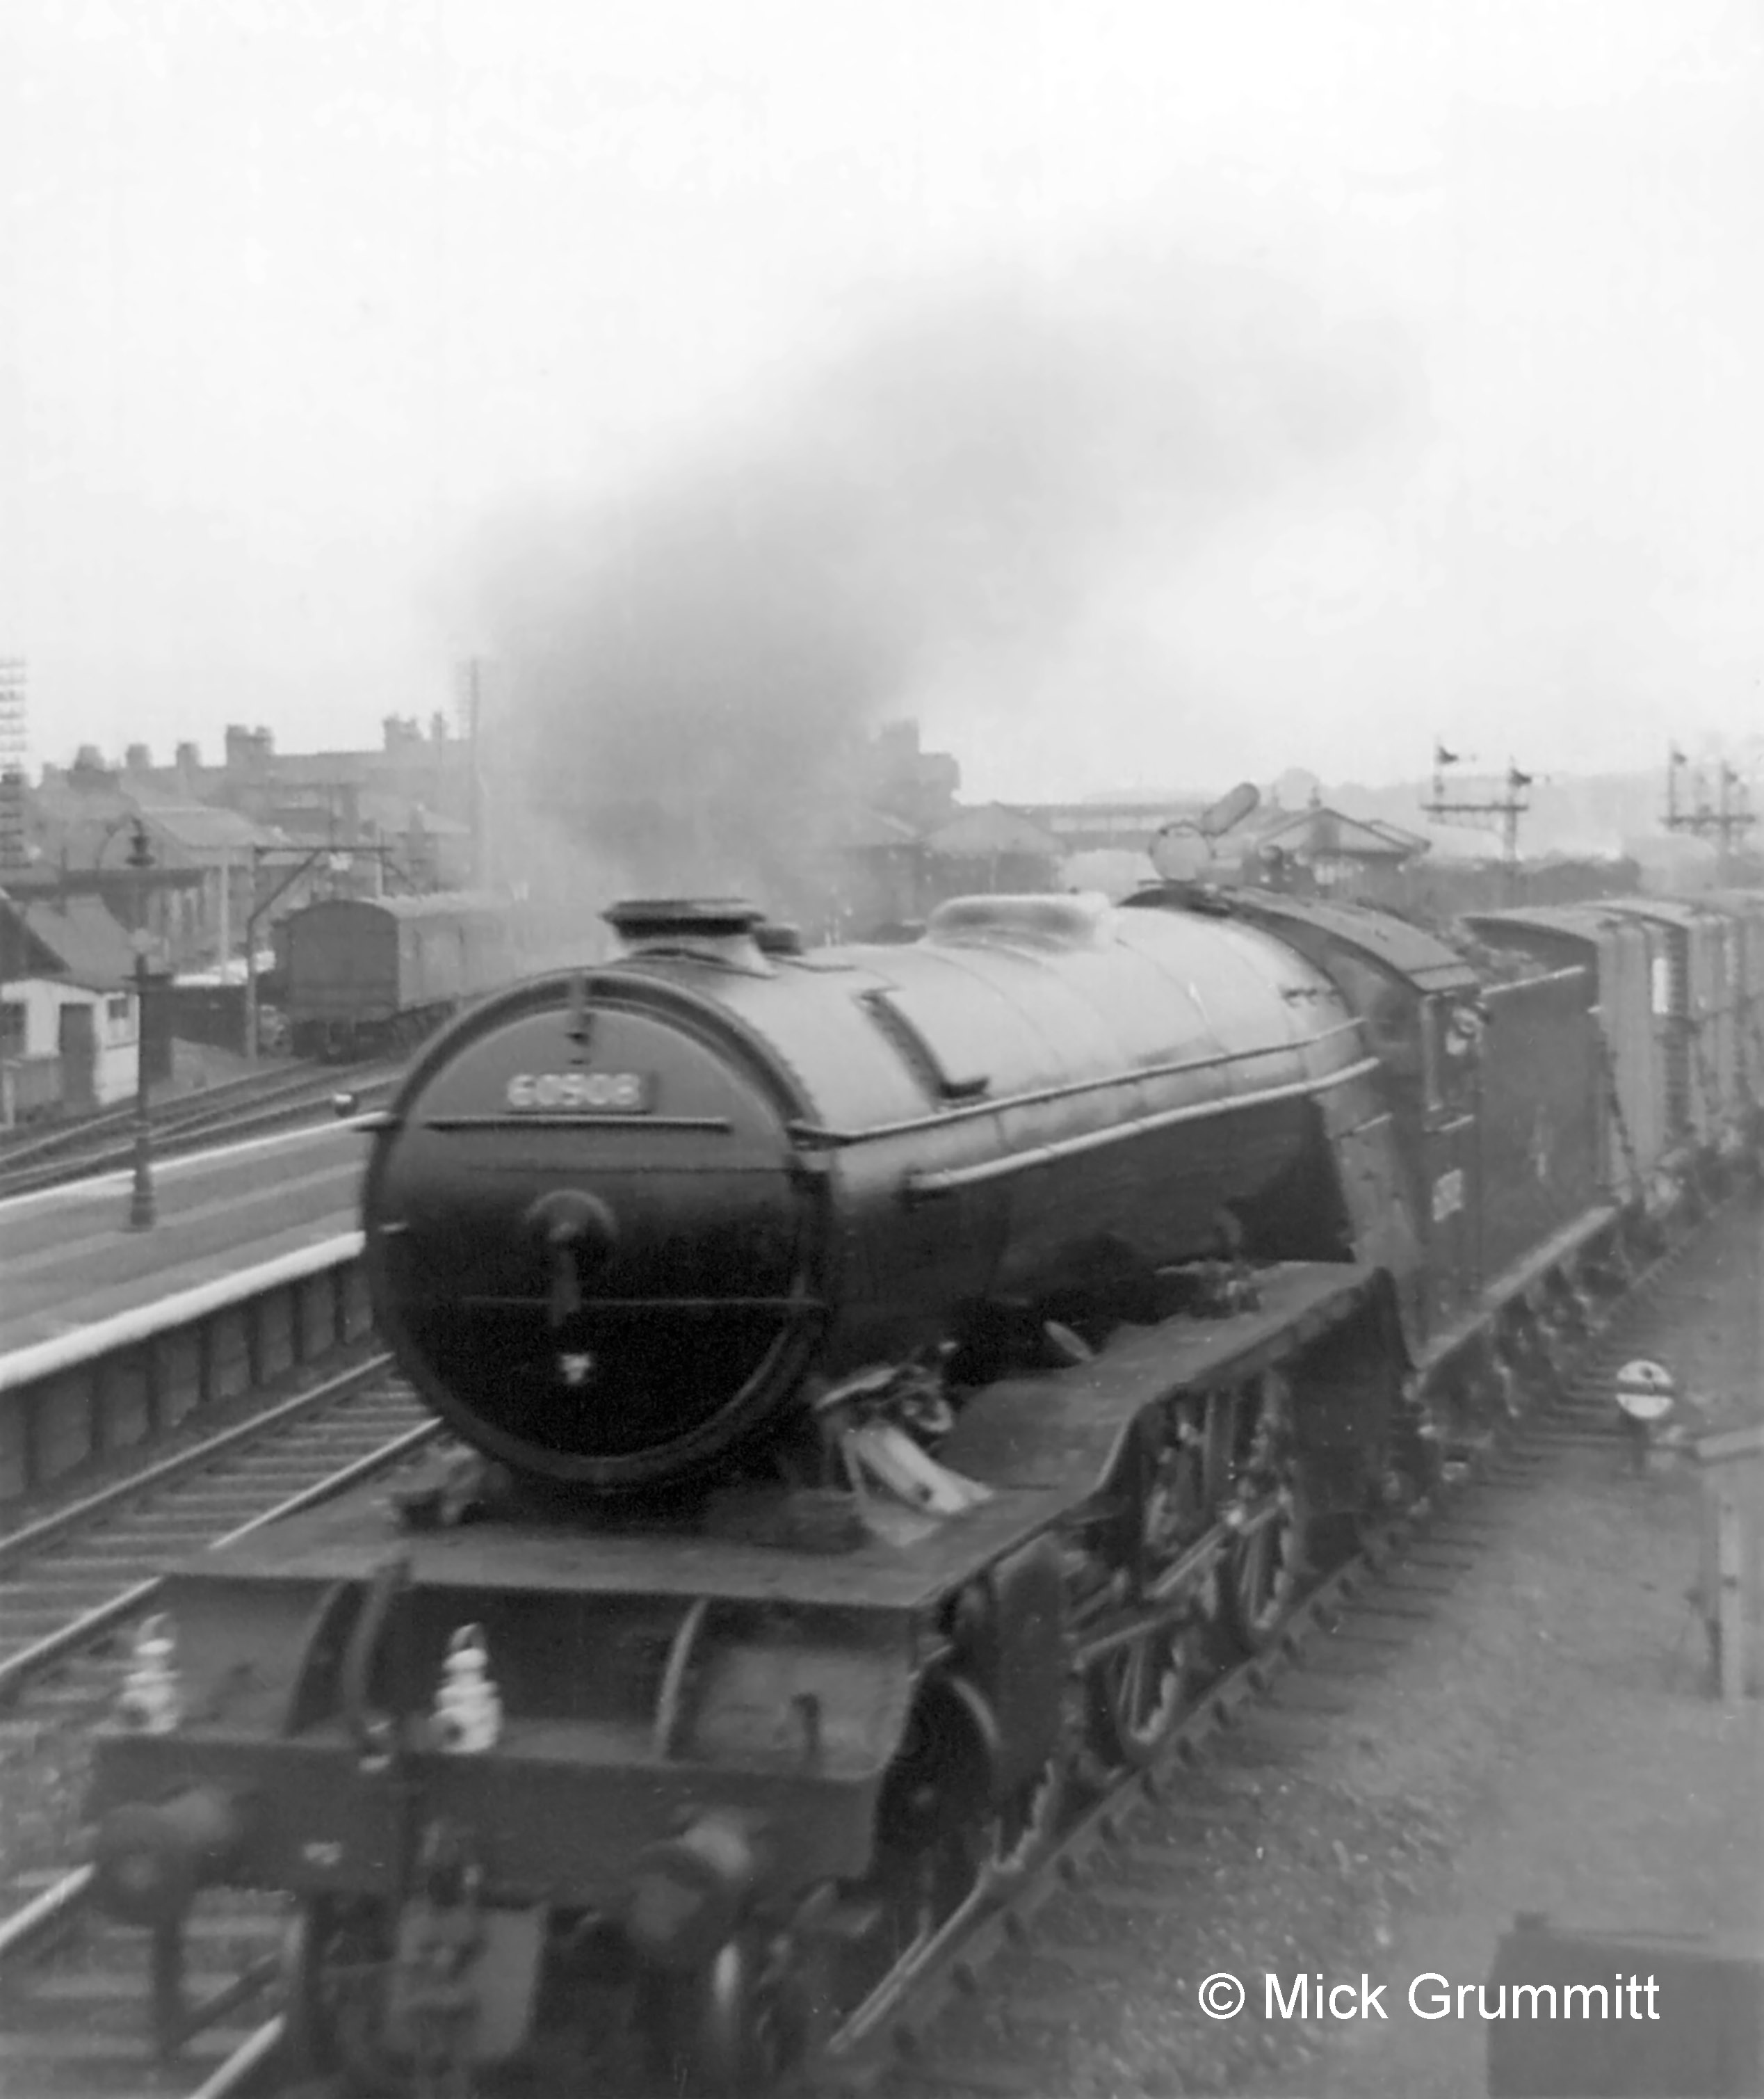
Class V2 No.60908 returned to traffic from overhaul at Darlington Works in September 1959, so the sparkling condition of its paintwork indicates a possible autumn 1959 date for this photo.
Photograph by Mick Grummitt.
Carriage Sidings and Loco Yard
In addition to the routes and connections listed above, all movements to and from the locomotive yard, the north end of the carriage sidings and the engineers’ sidings were controlled from the North Box.
The following memo of 1922 is a copy sent to the Yard Box, but it refers to engines leaving the running shed or 'Loco', all of which would exit the Loco yard over lines signalled from the North Box. Engines for Down trains remained at the north end of the station, while those for Up trains (final paragraph) were allowed 5 minutes' extra time to pass through to the south end of the station and Yard Box control.

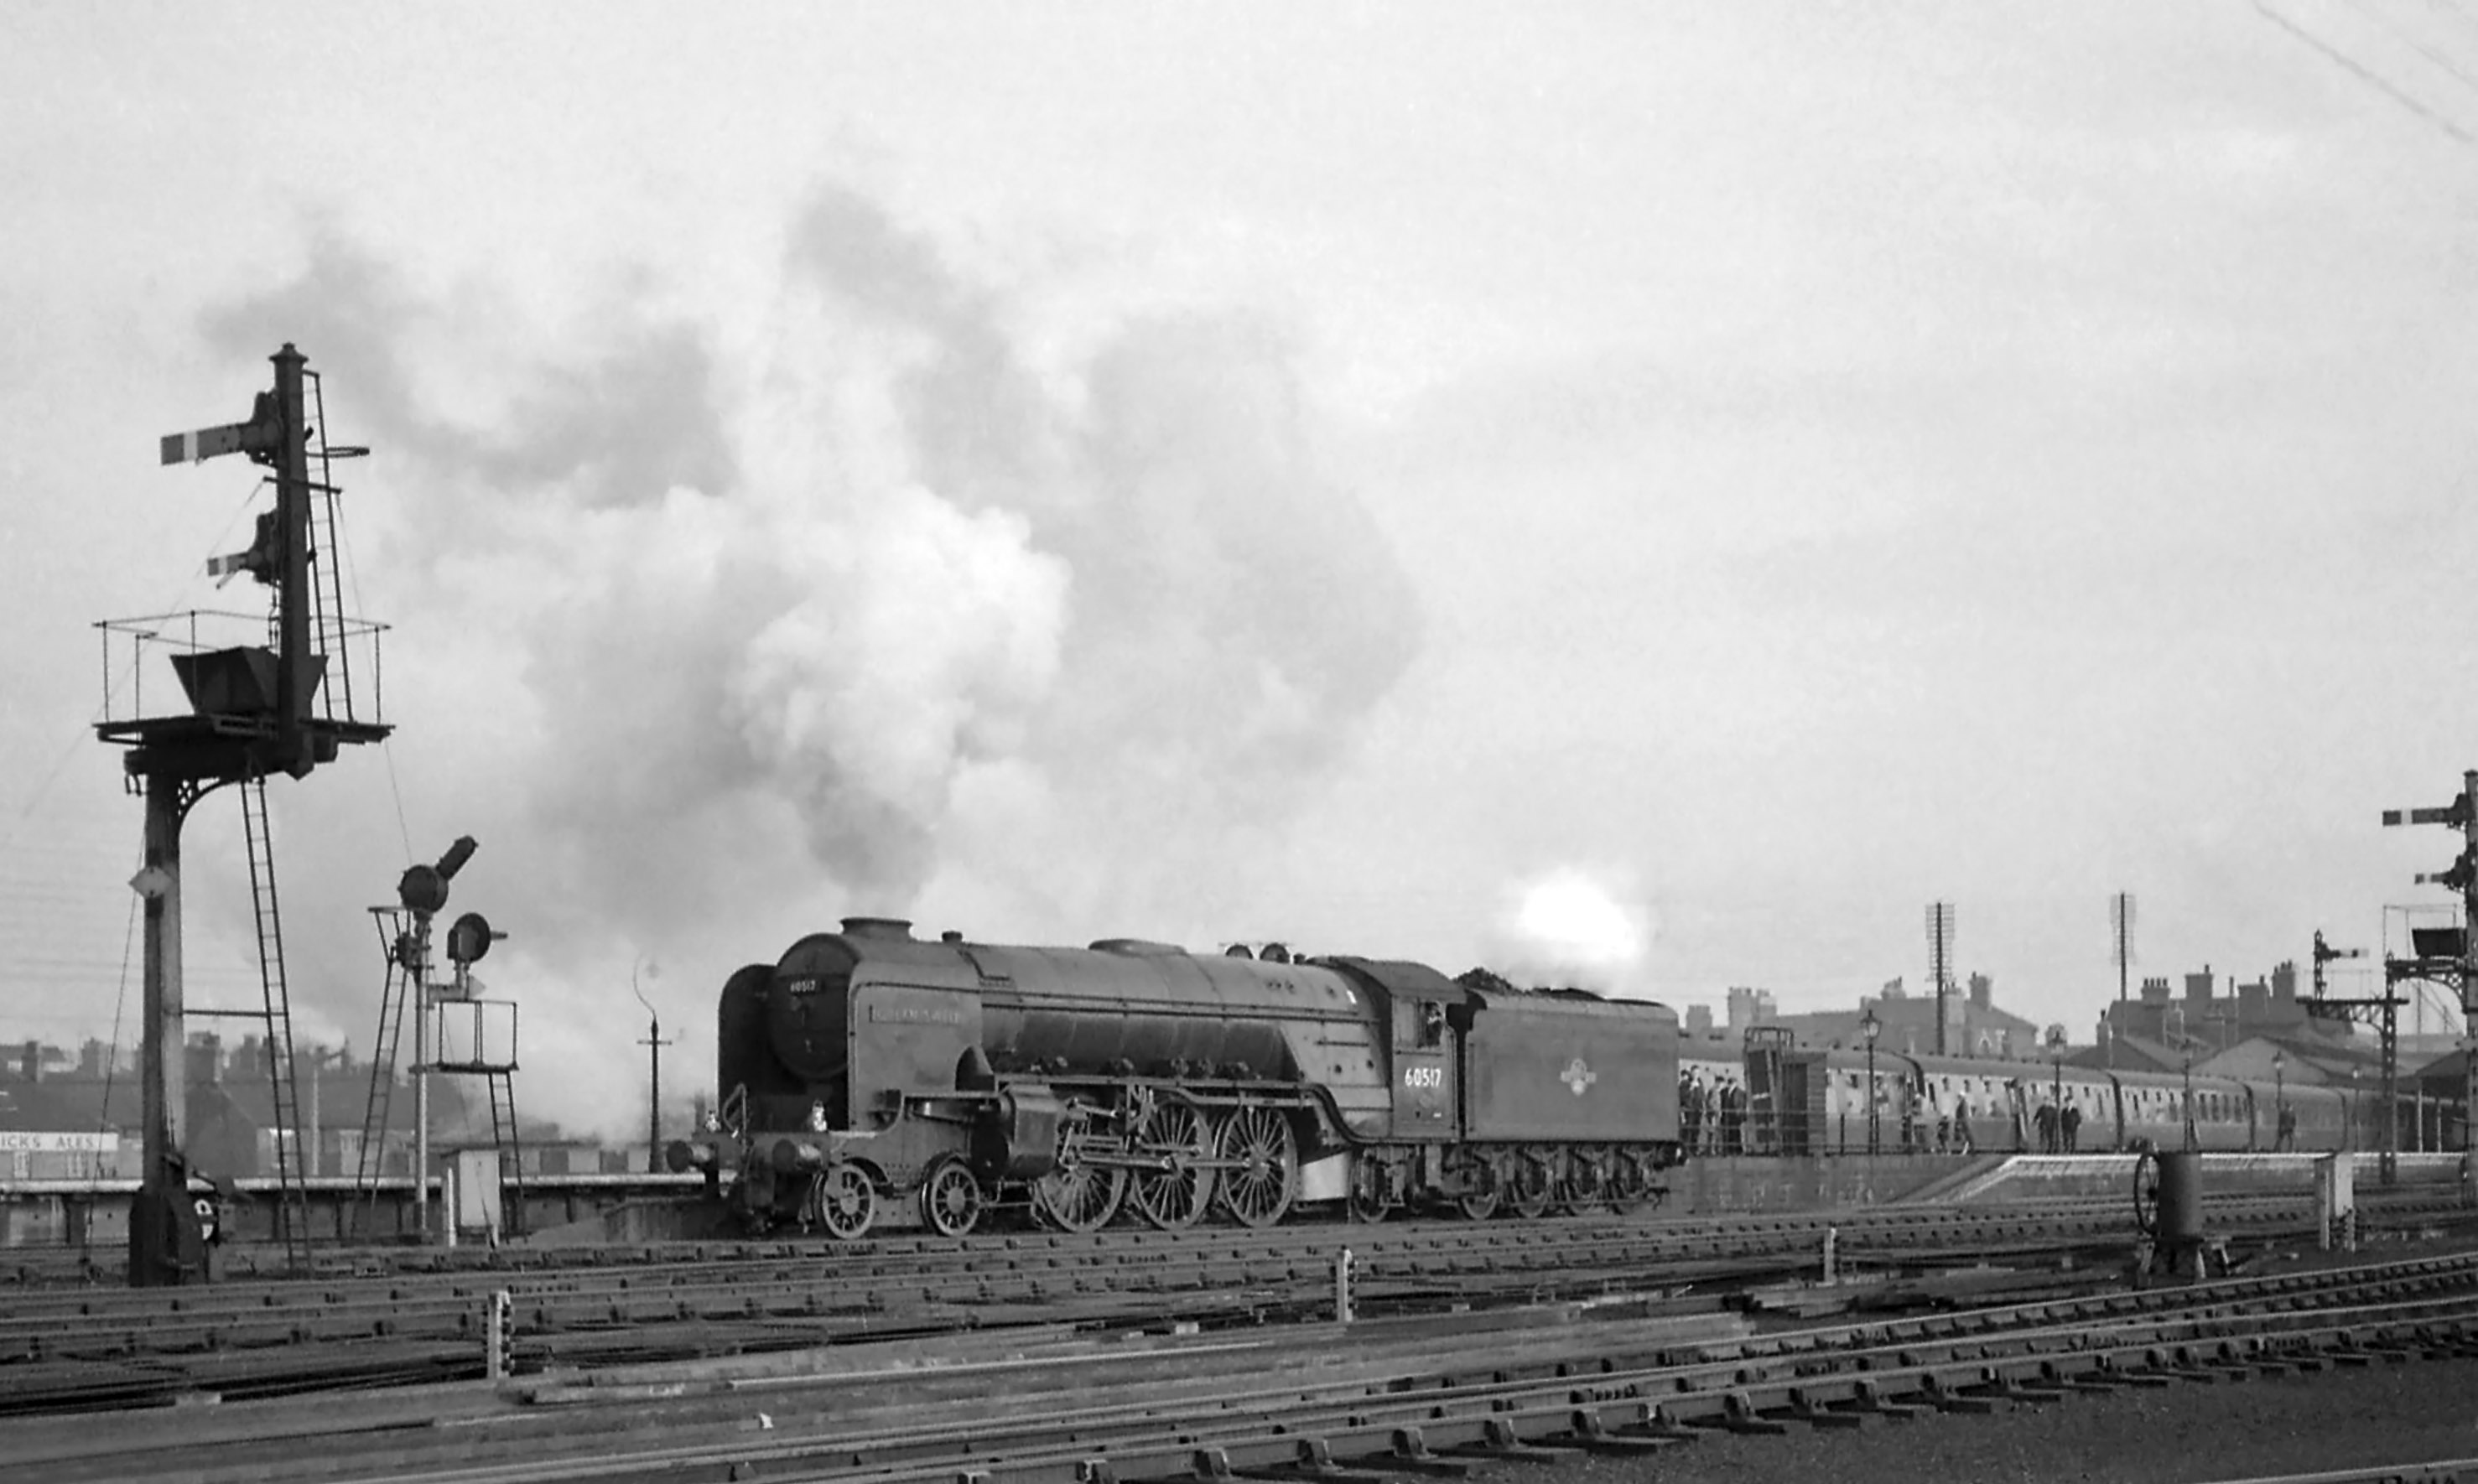
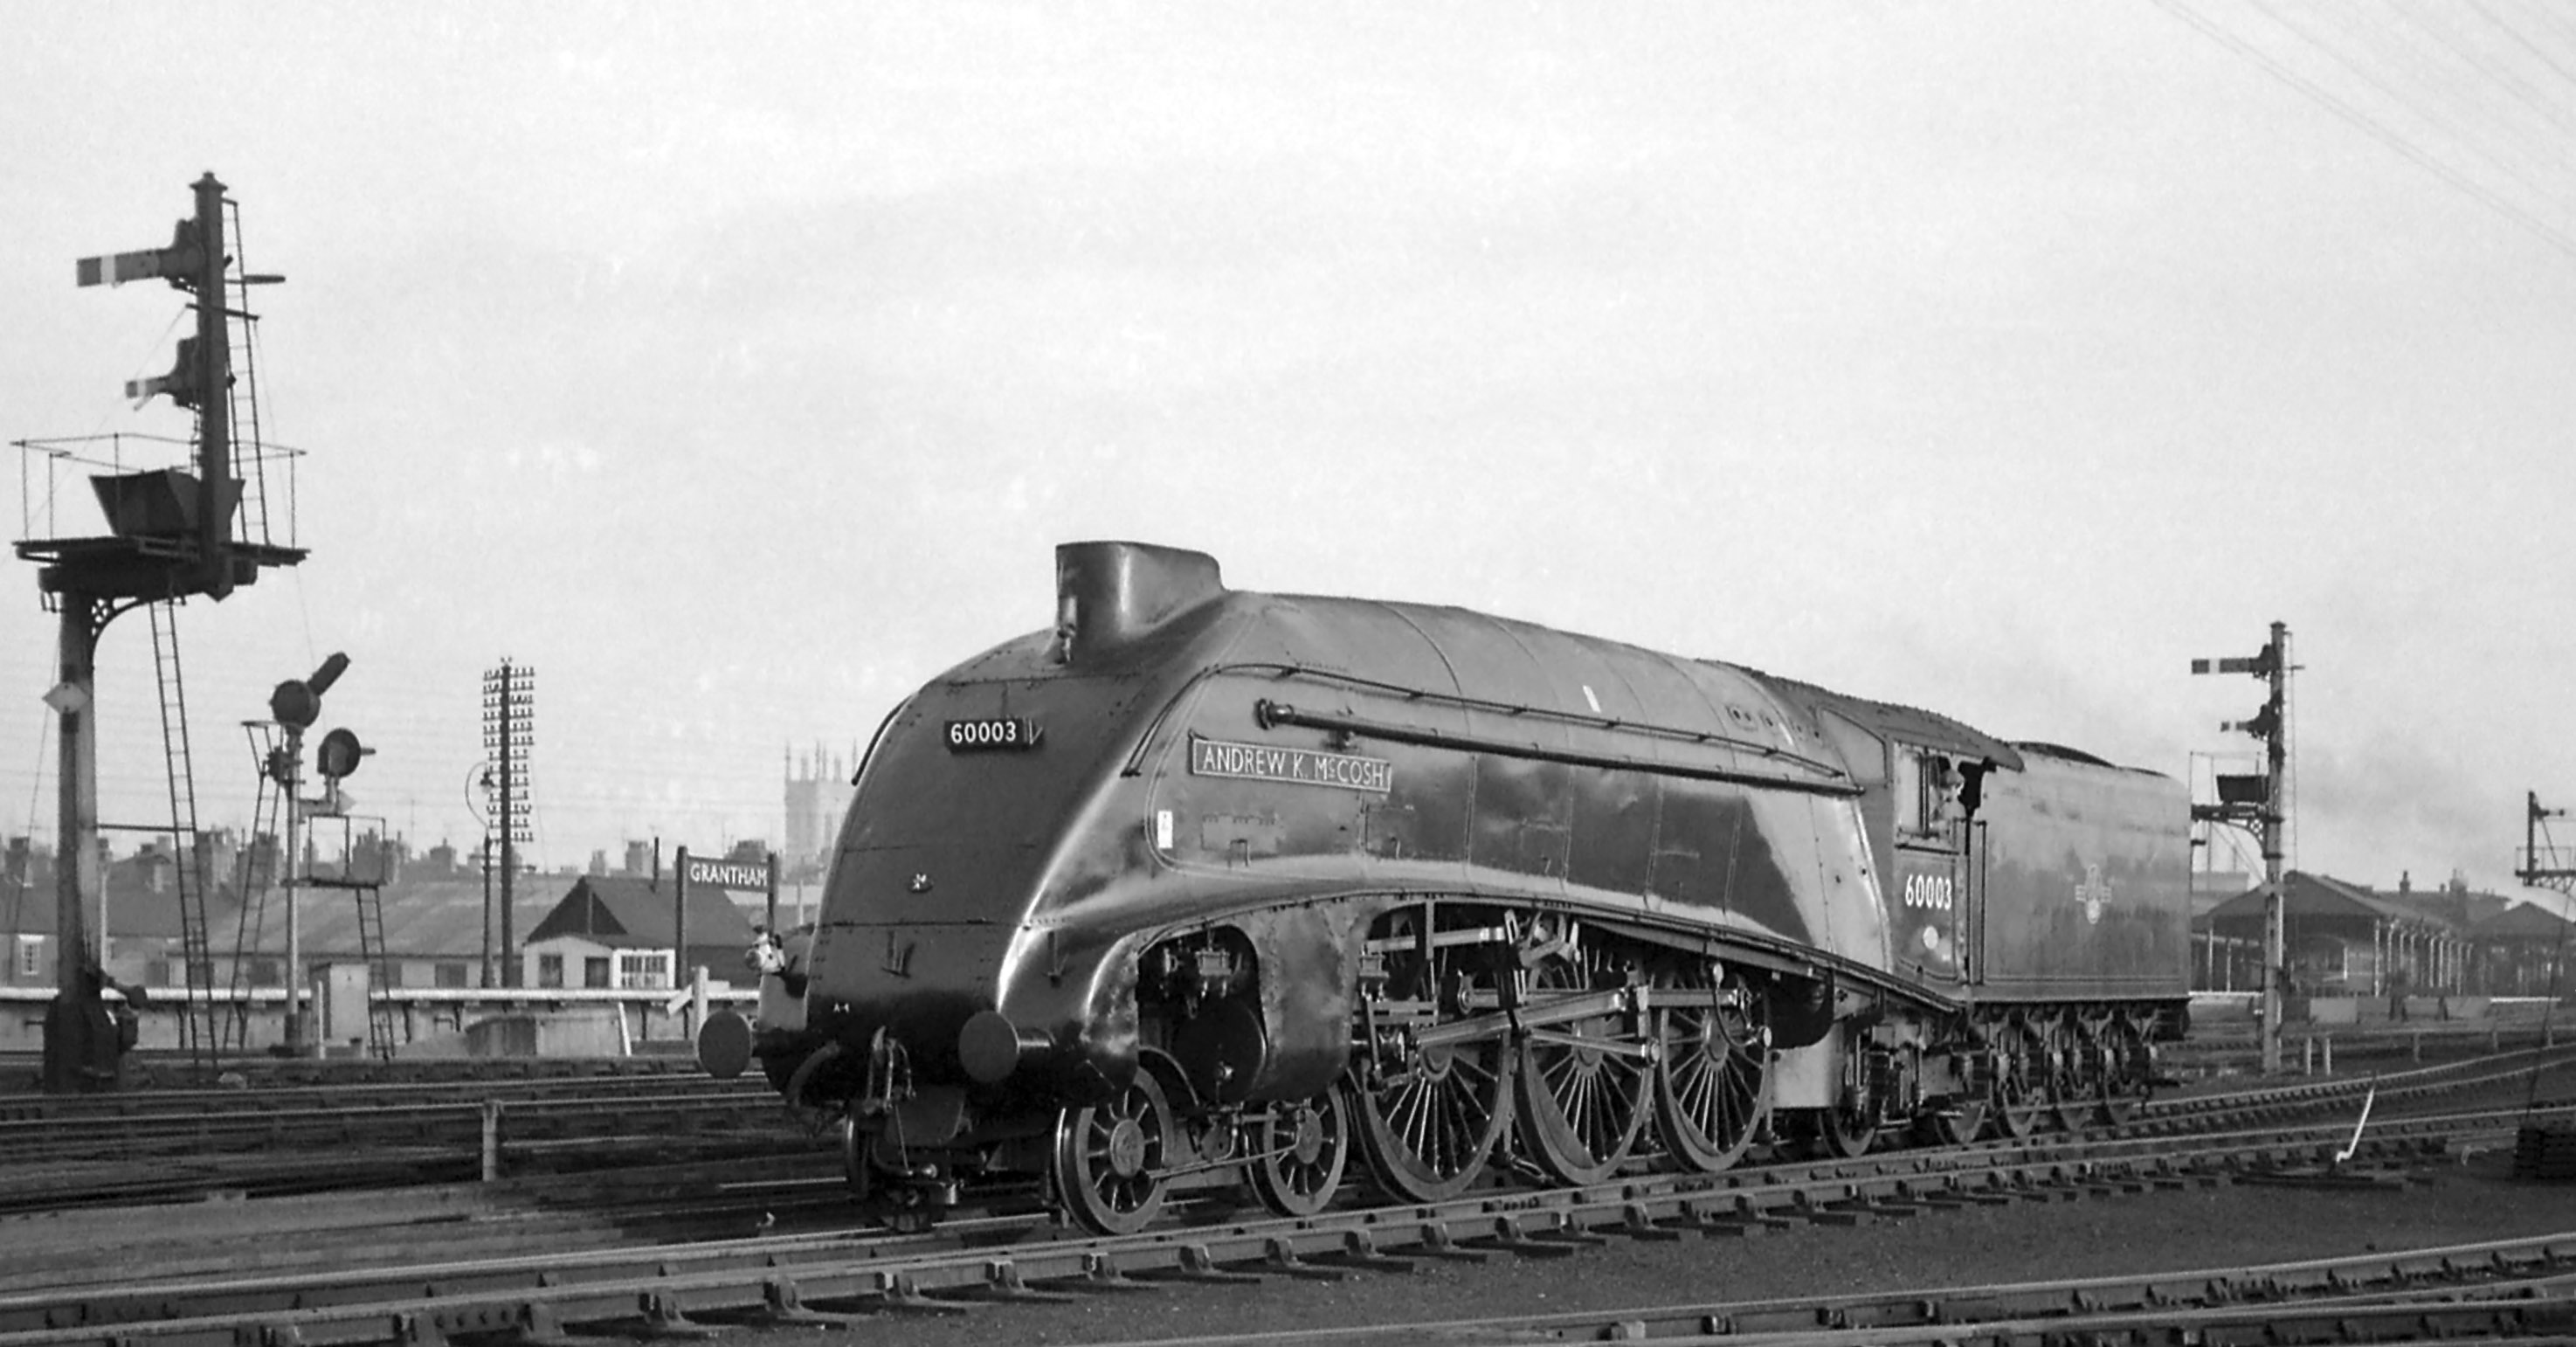
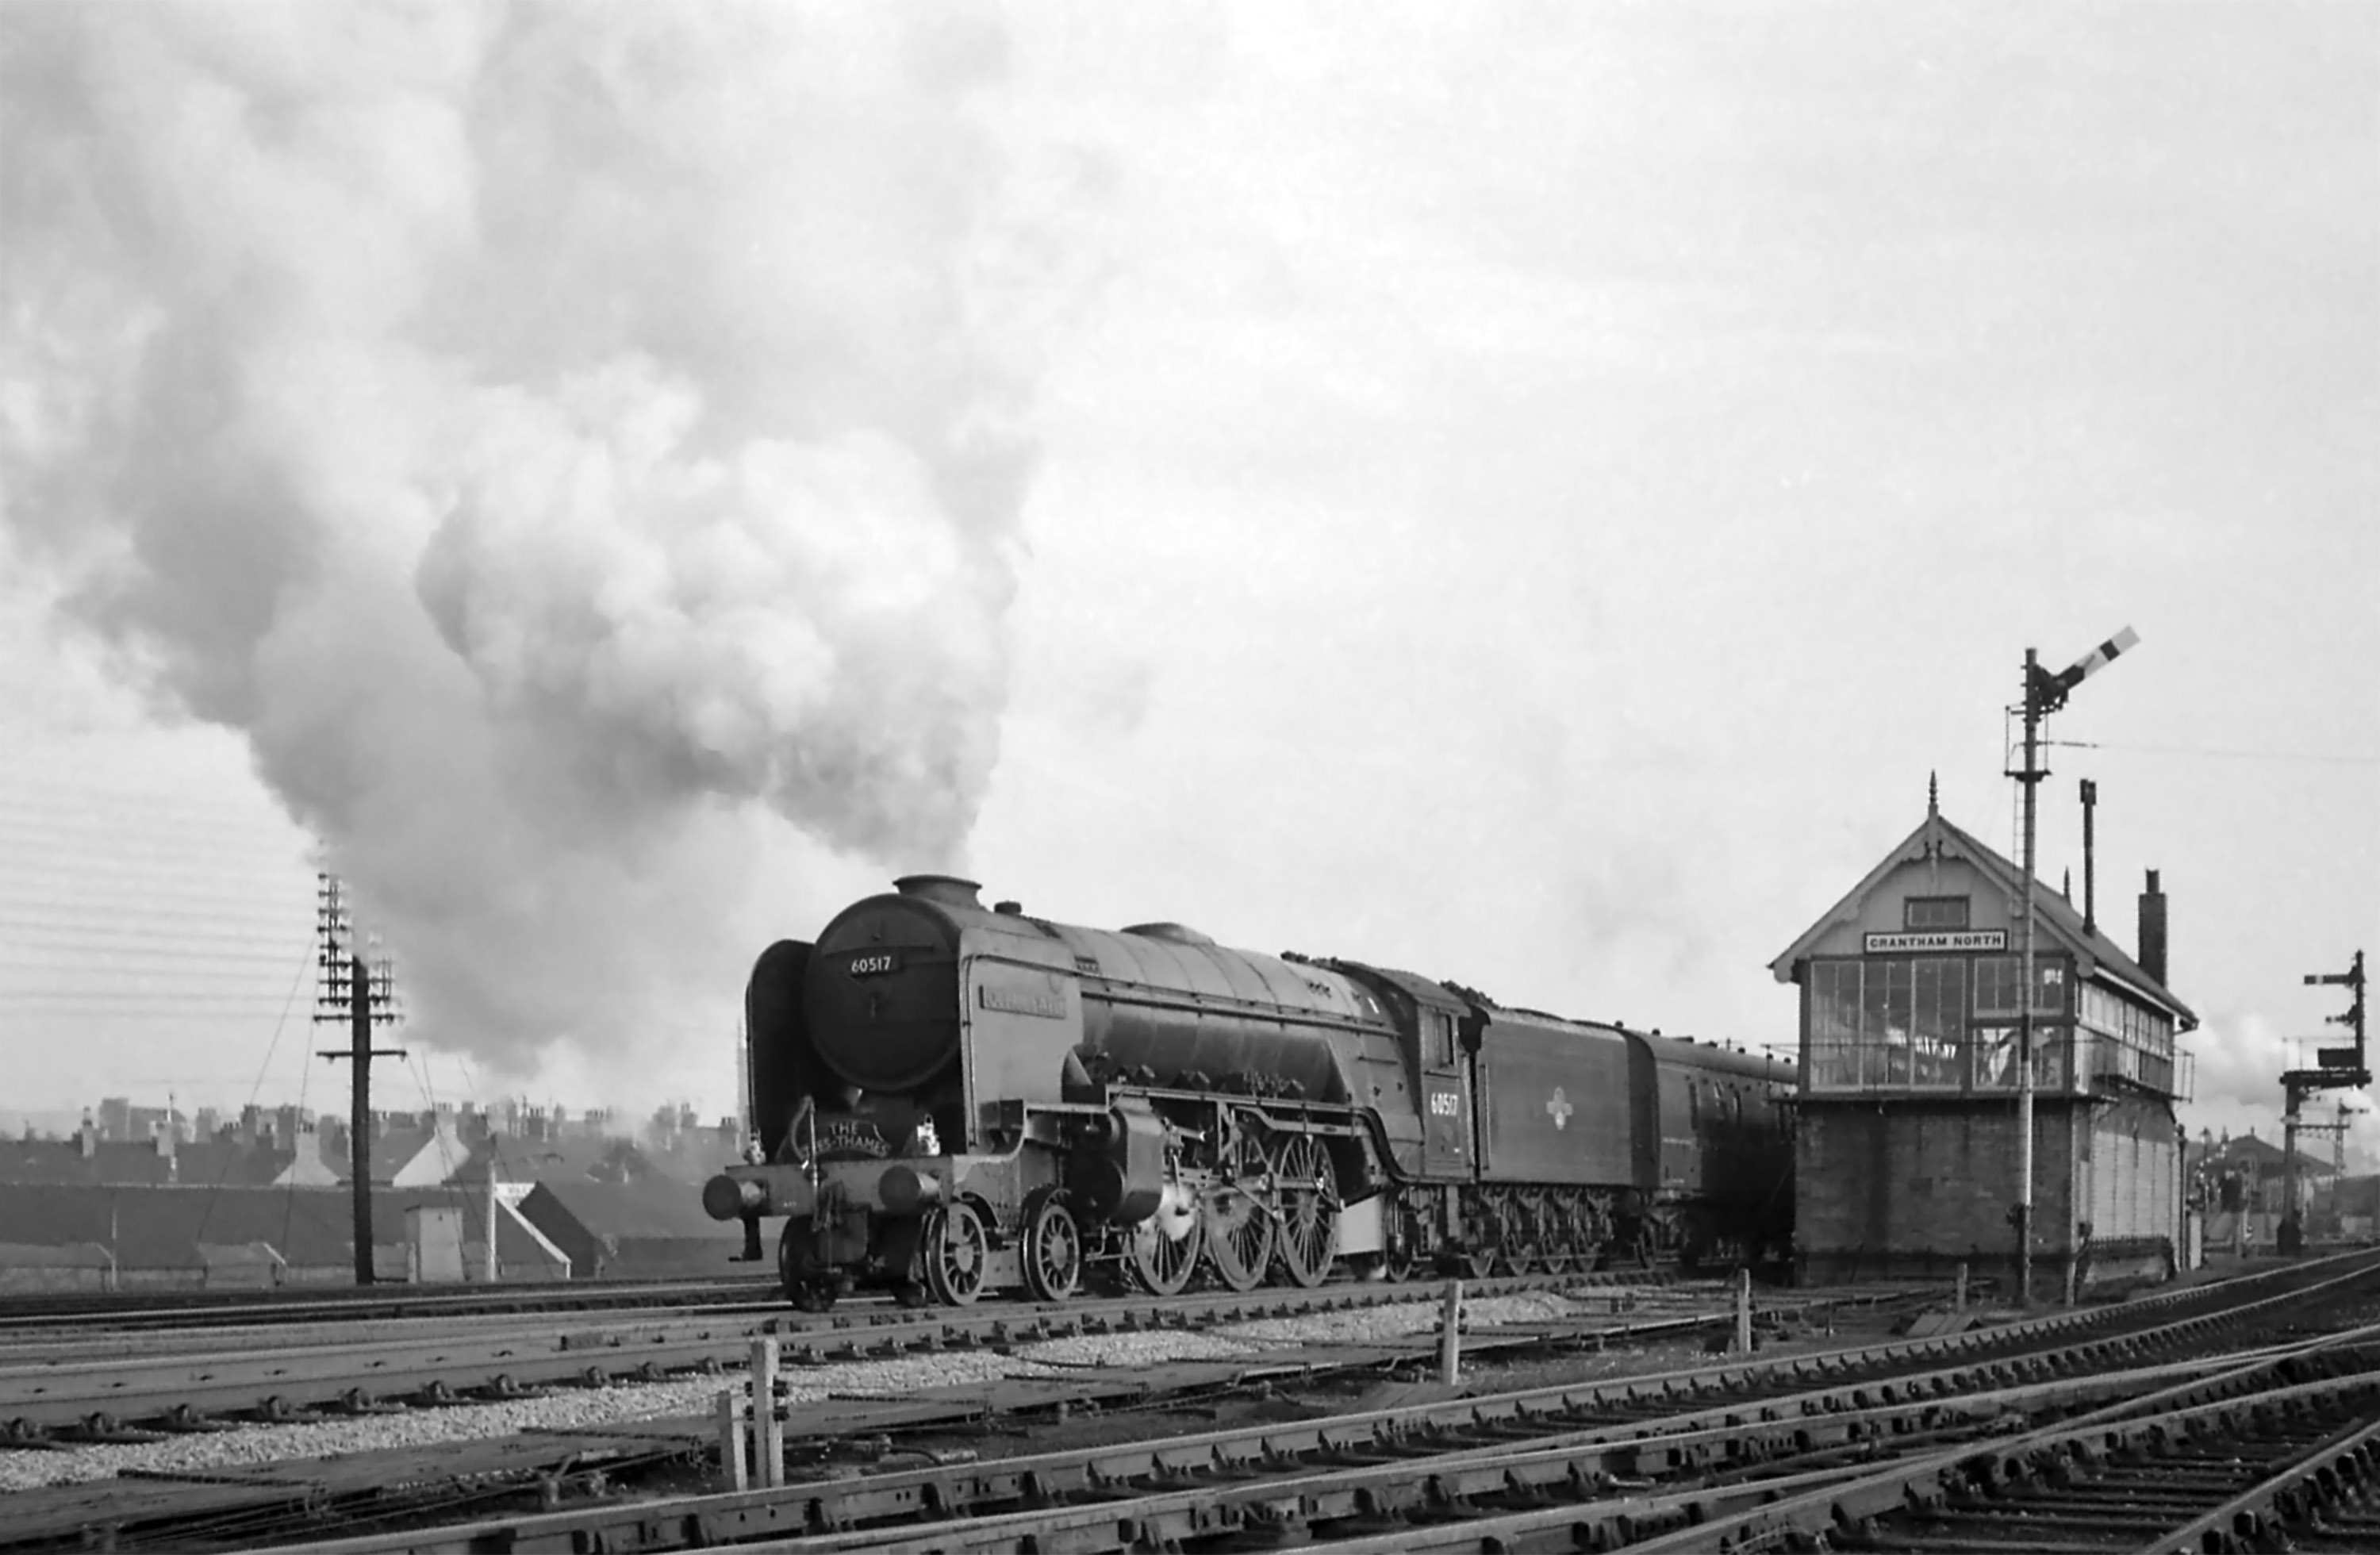
Locomotive Changes
Until the early 1960s Grantham was a regular locomotive exchange point on the East Coast Main Line. Changes on northbound trains were all managed from the box, but each locomotive proceeding to and from a change at the south end of the station had also to be passed through the North box’s area of operation.
Locomotive changes were part of the daily routine for the signalmen at Grantham North. Each locomotive change required the operation of signals and points in a well-practiced sequence. Teamwork by engine crews, signalmen and shunters gave Grantham a well deserved reputation for slick changeovers.
The following sequence of picture shows a typical locomotive change, featuring the northbound Tees-Thames Express which has been brought down from King's Cross by a London-based Class A4 locomotive and will be taken forward by a Class A2/3 locomotive based at Heaton shed in Newcastle. The Tees-Thames Express ran between Saltburn and London King's Cross, via Middlesbrough, from November 1959 until September 1961.

Photograph taken by Noel Ingram.
No. 60517 is still waiting in the right background, its fireman making final preparations by building up the fire.
Photograph taken by Noel Ingram.
Photograph taken by Noel Ingram.
Photograph taken by Noel Ingram.
Photograph taken by Noel Ingram.
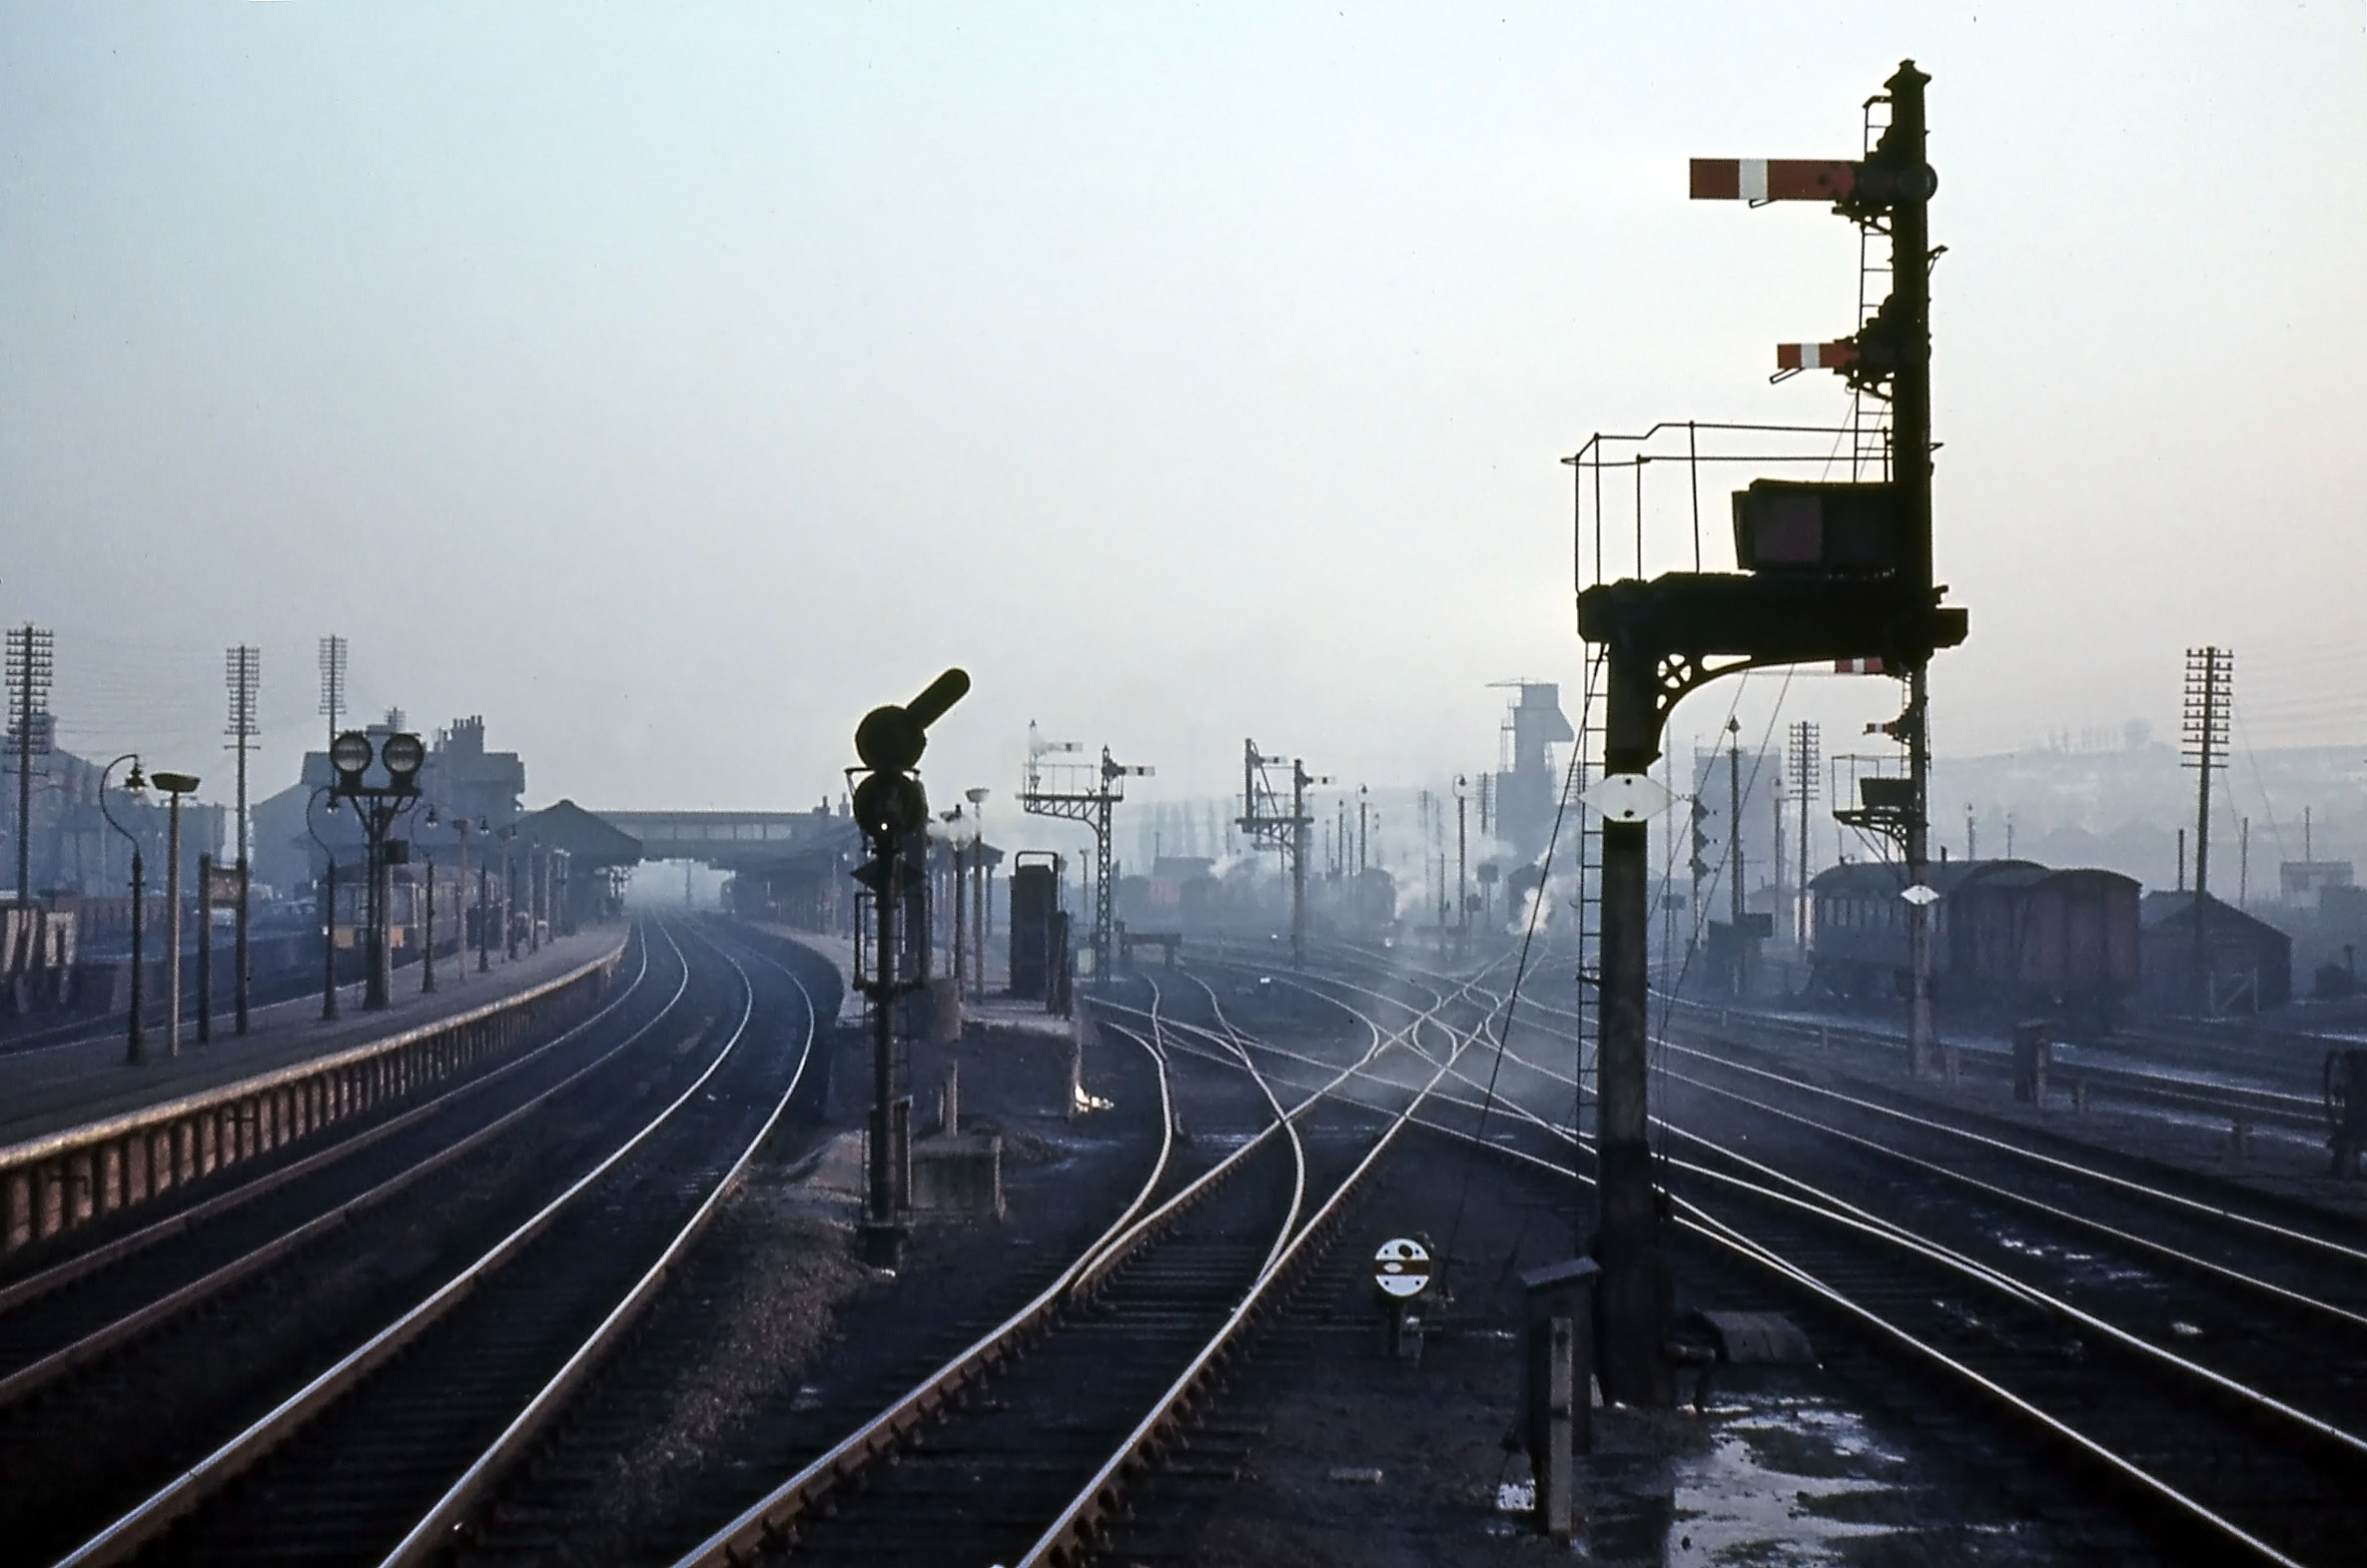
Some of the Signals South of the Box
The following sequence of photographs attempts to show how part of the complex layout of tracks, junctions and connections at Grantham North was controlled in the days of - largely - semaphore signalling.
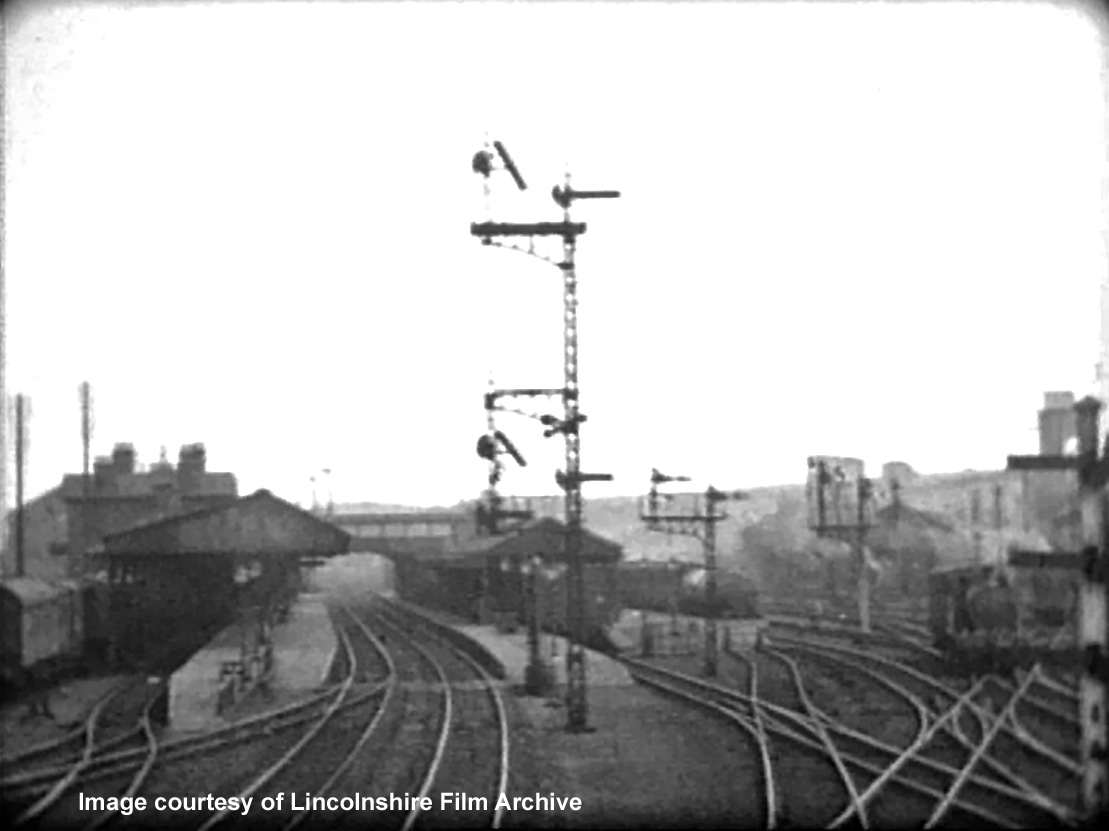
The most prominent signal post, at the centre of the view, controls the Down (northbound) Main line immediately to its right (as viewed from an approaching train).
In this direction behind the photographer there is a choice of two routes: continuing on the Main line towards Newark, or a junction diverging to the left towards Nottingham (again, as viewed from an approaching train). A signal relating to the Nottingham line is therefore situated to the left of the Main line signal as viewed by an approaching driver. The Nottingham line signal is also at a slightly lower height because it refers to the less important route.
This particular signal has duplicate ‘co-acting’ arms at high level because the station footbridge prevents drivers seeing the low level signals from a distance.
So we can ‘read’, from the location of the inclined arms in the photograph, that the route is set for a train to pass northbound through the station and to continue along the Main line.
To the right of the tall post, as viewed in the photograph, are two similar junction signals (without high level co-acting arms) which control northbound departures from the Bay platform and the Western platform. Both provide the option of Main line or Nottingham line routing.
On the extreme right of the photograph is a signal post with three arms. This controls trains approaching the station from the Nottingham line. Each arm indicates a different route and they read ‘top to bottom’ = ‘left to right’. So far as we can tell (can anyone confirm or correct this?) if the top arm is lowered the route would be set into the Bay platform, the middle arm probably applies to the short engine spur off the Bay platform line, and the bottom arm most likely indicates the Western platform. This vertical arrangement of signal arms indicating different routes had been in use since the earliest days of railway signalling. Bracket-type junction signals gave a clearer indication and they had generally replaced the vertical arrangement, except in sidings.
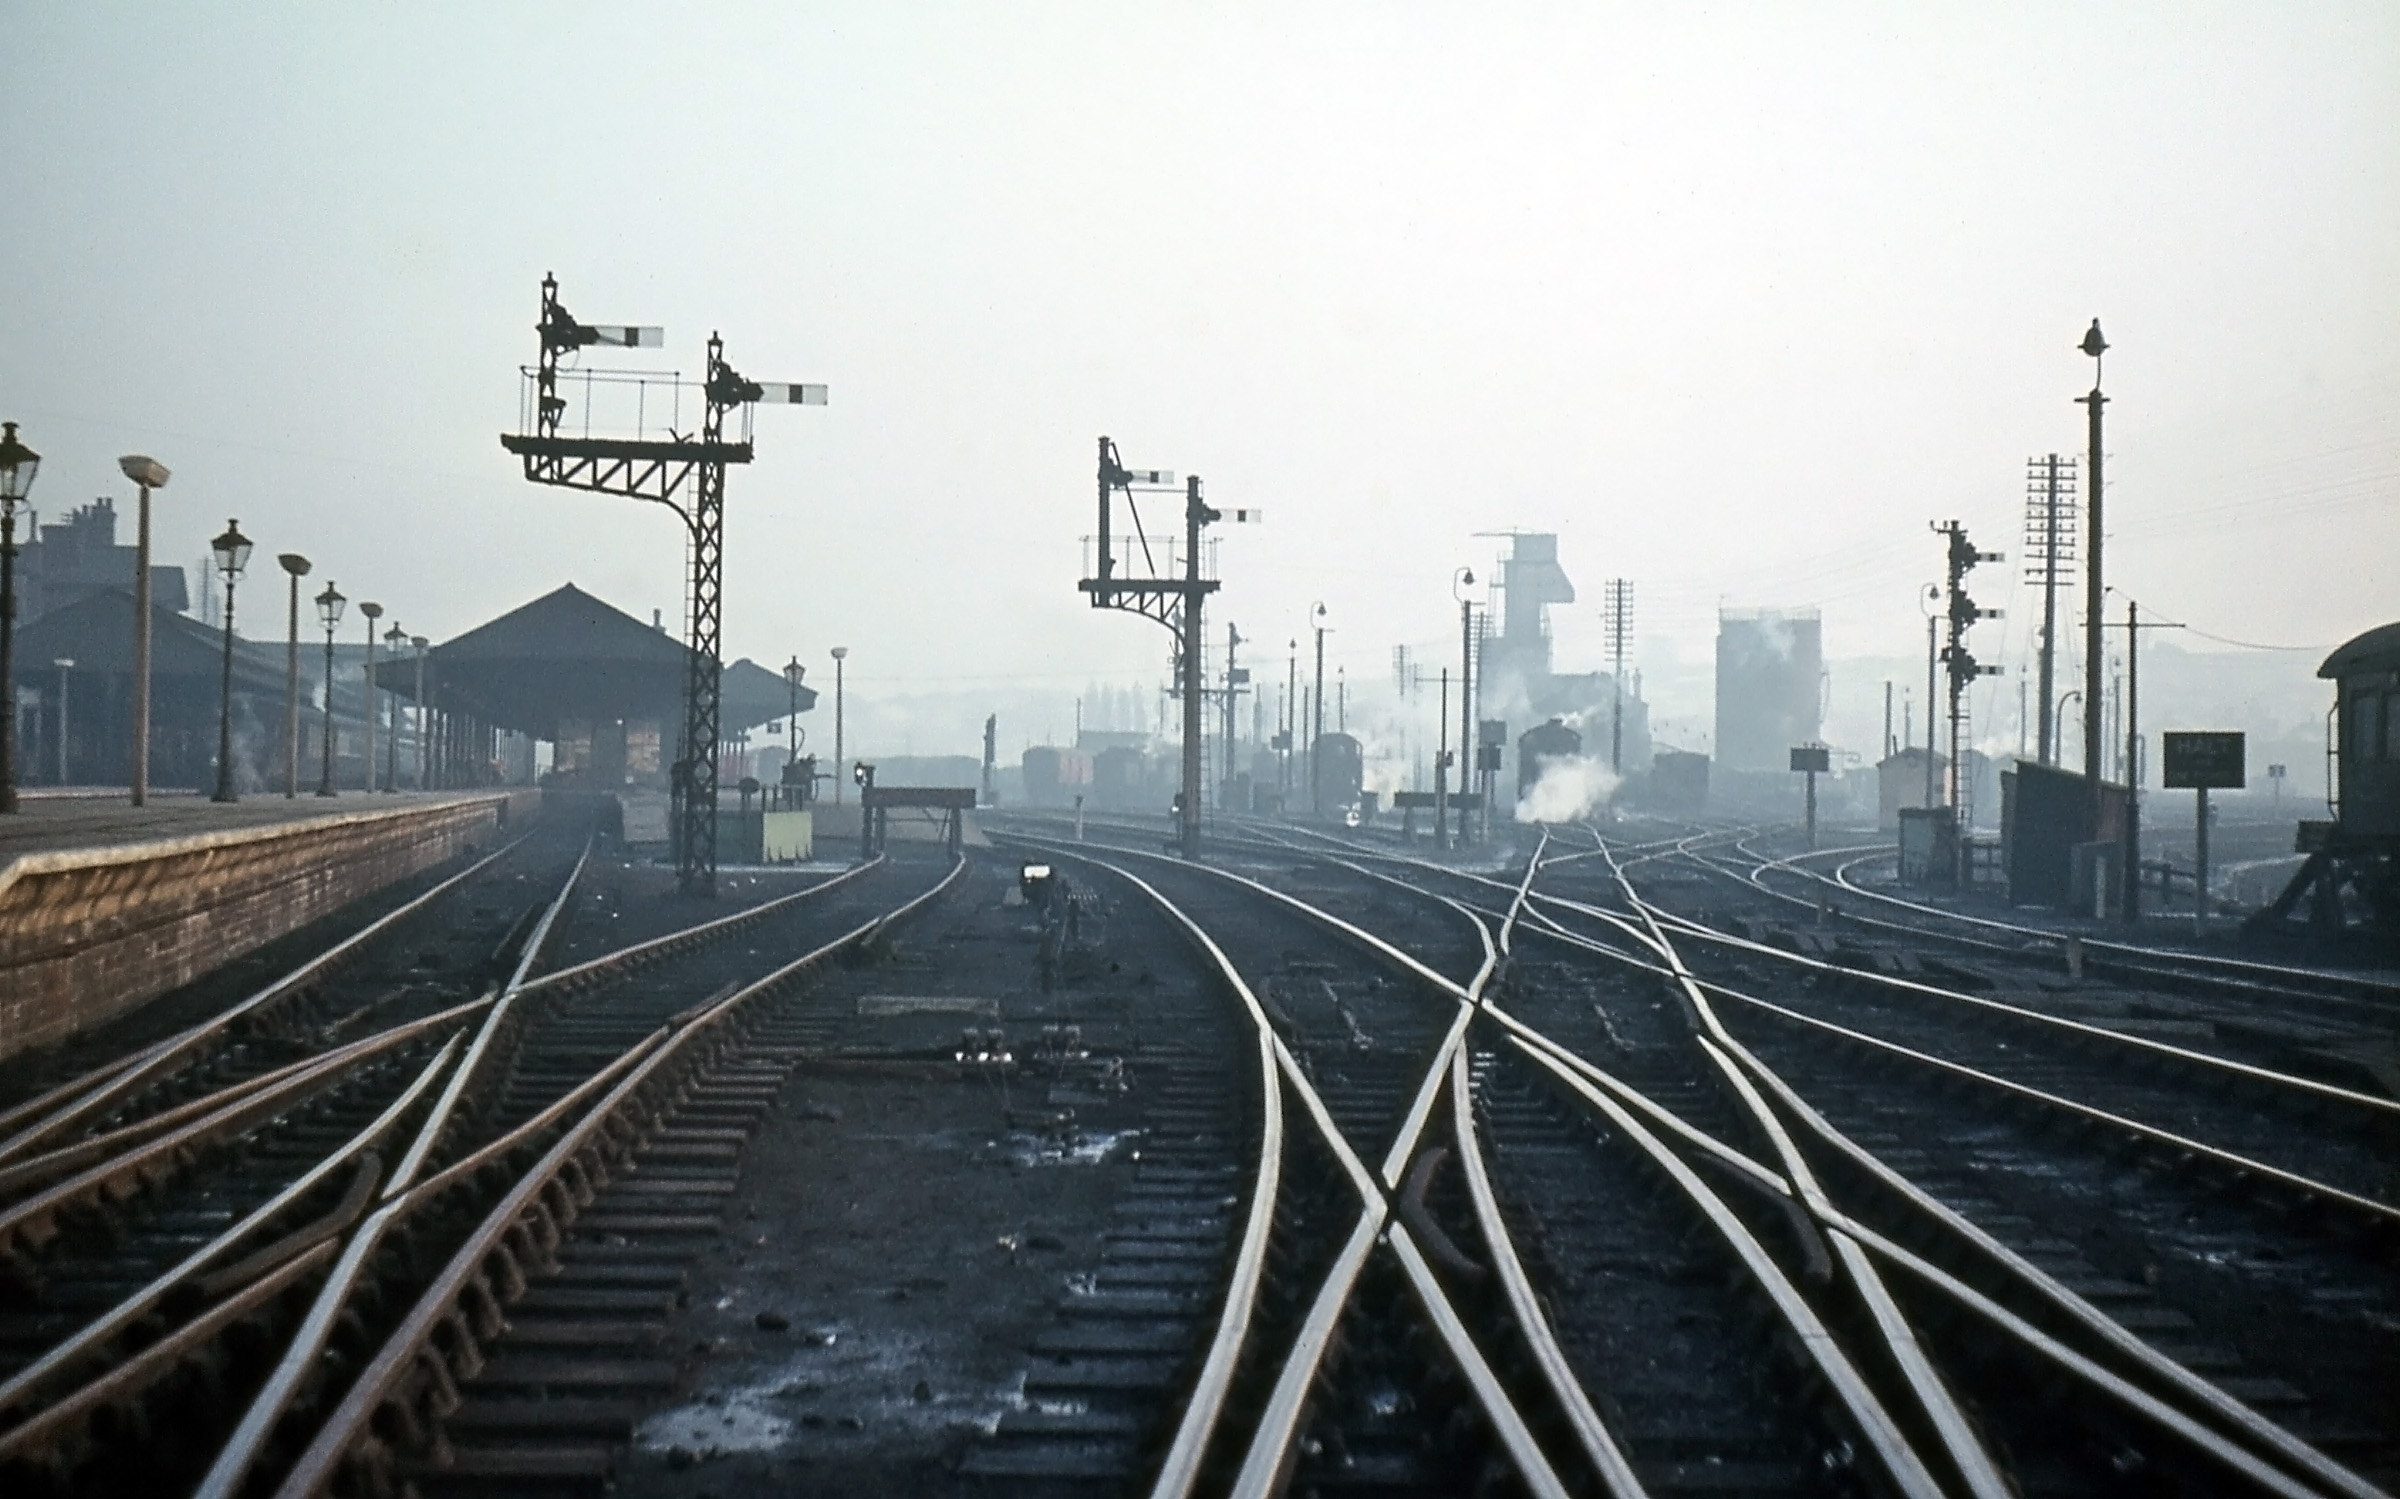
Photo taken from a cine film shot by photographer and film maker Walter Lee of Grantham. © Lincolnshire Film Archive
o The tall Main line signals have been replaced with a colour light signal which showed an inclined row of white lights if the Nottingham line was to be taken.
o The Bay platform and Western platform departure signals are unchanged.
o The old-style signal controlling access from the Nottingham direction has been replaced by the bracketed post in the right foreground. It has one full-sized and one miniature arm together with an electric route indicator in the box beneath them. The full-size arm gave access to one of three principal routes, provided that it was clear. The miniature arm permitted access to sidings or, under caution, to a principal route which was already occupied. When either arm was raised the route indicator showed a code to inform the driver of the route set:
o DB – Down Bay
o ES – Engine Spur (miniature arm only)
o W – Western platform
o C – Carriage sidings (miniature arm only)
o UG – Up Goods line
o S – Shunt line (miniature arm only)
Further back and across to the right is a similar signal post controlling access to the Goods line in the southbound (or Up) direction. Again it has both a full size and a miniature arm, and a route indicator capable of showing routes as follows:
o C – Carriage sidings (miniature arm only)
o UG – Up Goods line
o S – Shunt line (miniature arm only)
Beyond is a signal post with three miniature arms mounted vertically. This was the shed outlet signal which is seen more clearly in the next photograph.
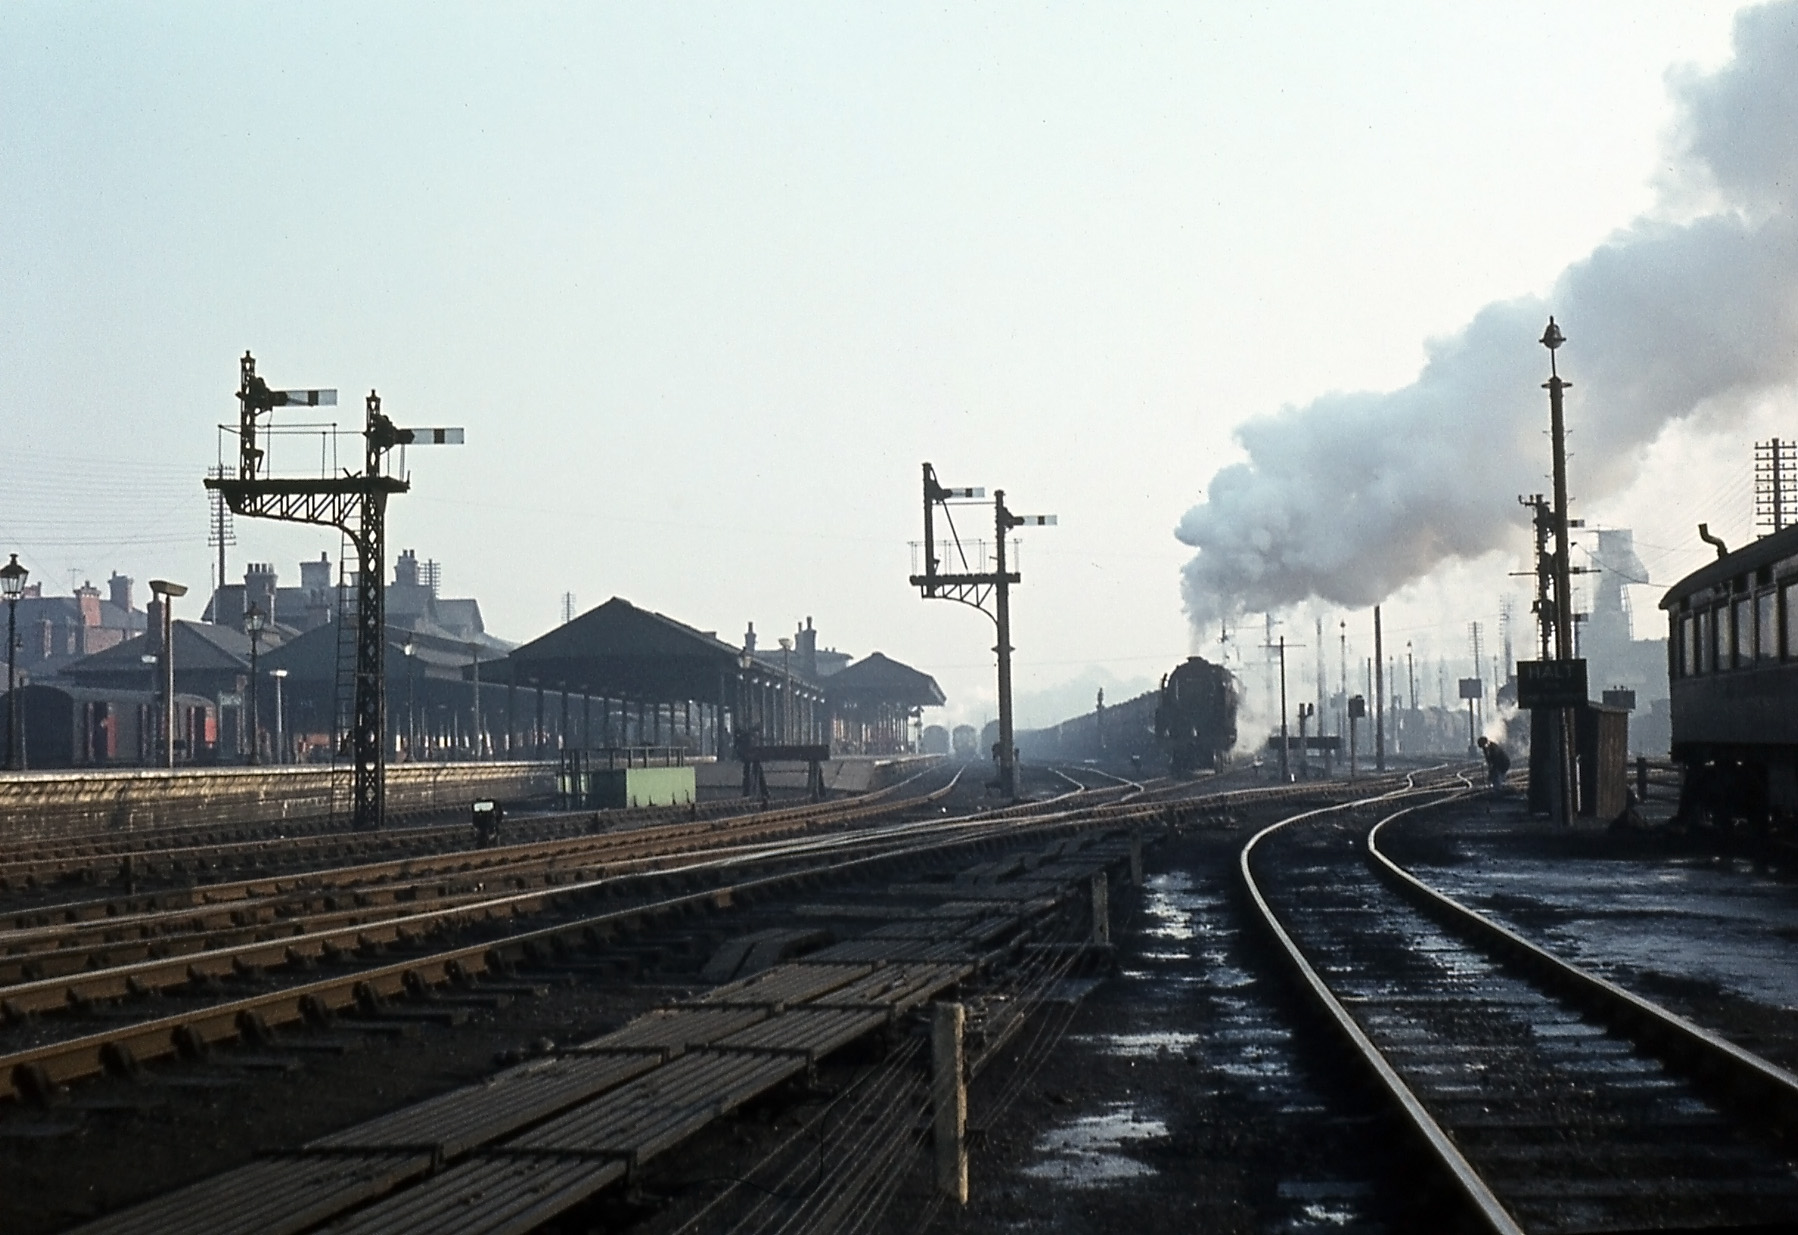
Photograph taken by Noel Ingram.
The shed outlet signal is prominent on the right. Reading as before ‘top to bottom’ = ‘left to right’ the top arm indicated the Goods line, the middle arm the Nottingham line and the bottom arm the Main line. Nearby there was a box containing a telephone from which the fireman of every locomotive leaving the shed would phone the North Box signalman to tell him which train they were for, so that the correct road could be set. If they were going to stand ready to take forward an incoming train the signalman would relay information about how it was running.
The elegant cast iron gas lighting columns on the platform are being replaced by electric lights on concrete posts.
In the distance at the centre, partly obscured by the Western platform departure signal, is another bracket signal which controls the Up & Down Goods line in the Down direction – see the next photograph.
Photograph taken by Noel Ingram.
Photograph taken by Noel Ingram.
Photograph taken on 31st August 1961 by Cedric A. Clayson, © John Clayson.
Now imagine that you could enter the photo above, walk towards the man crossing the tracks near the centre of the view, go a few yards past him, turn around and travel back in time 28 years. You’d see something like this…

Looking to the left background we can see that the tall Down Main line signal is lowered for a train taking the Nottingham line at the junction. To its right is the Western platform departure signal before conversion to upper quadrant arms.
Photograph taken on 5th June 1933 by Frank G. Carrier.
Malcolm Rush visited Grantham North signal box on Wednesday 4th January 1967 to sketch the track diagram, take a photograph and make notes. Malcolm's drawing, photograph and notes, along with links to other photographs and information, can be seen here. This was part of a wider project involving visits to record similar details at 184 signal boxes.
Forward to An outline history of Grantham North signal box
Back to the Grantham North box index page
Copyright note: the article above is published with the appropriate permissions. For information about copyright of the content of Tracks through Grantham please read our Copyright page.